Prereqs (local machine)
kubectlinstalled- Your cluster KubeConfig downloaded from the K8s Clusters console
A) Create the Kubernetes Cluster
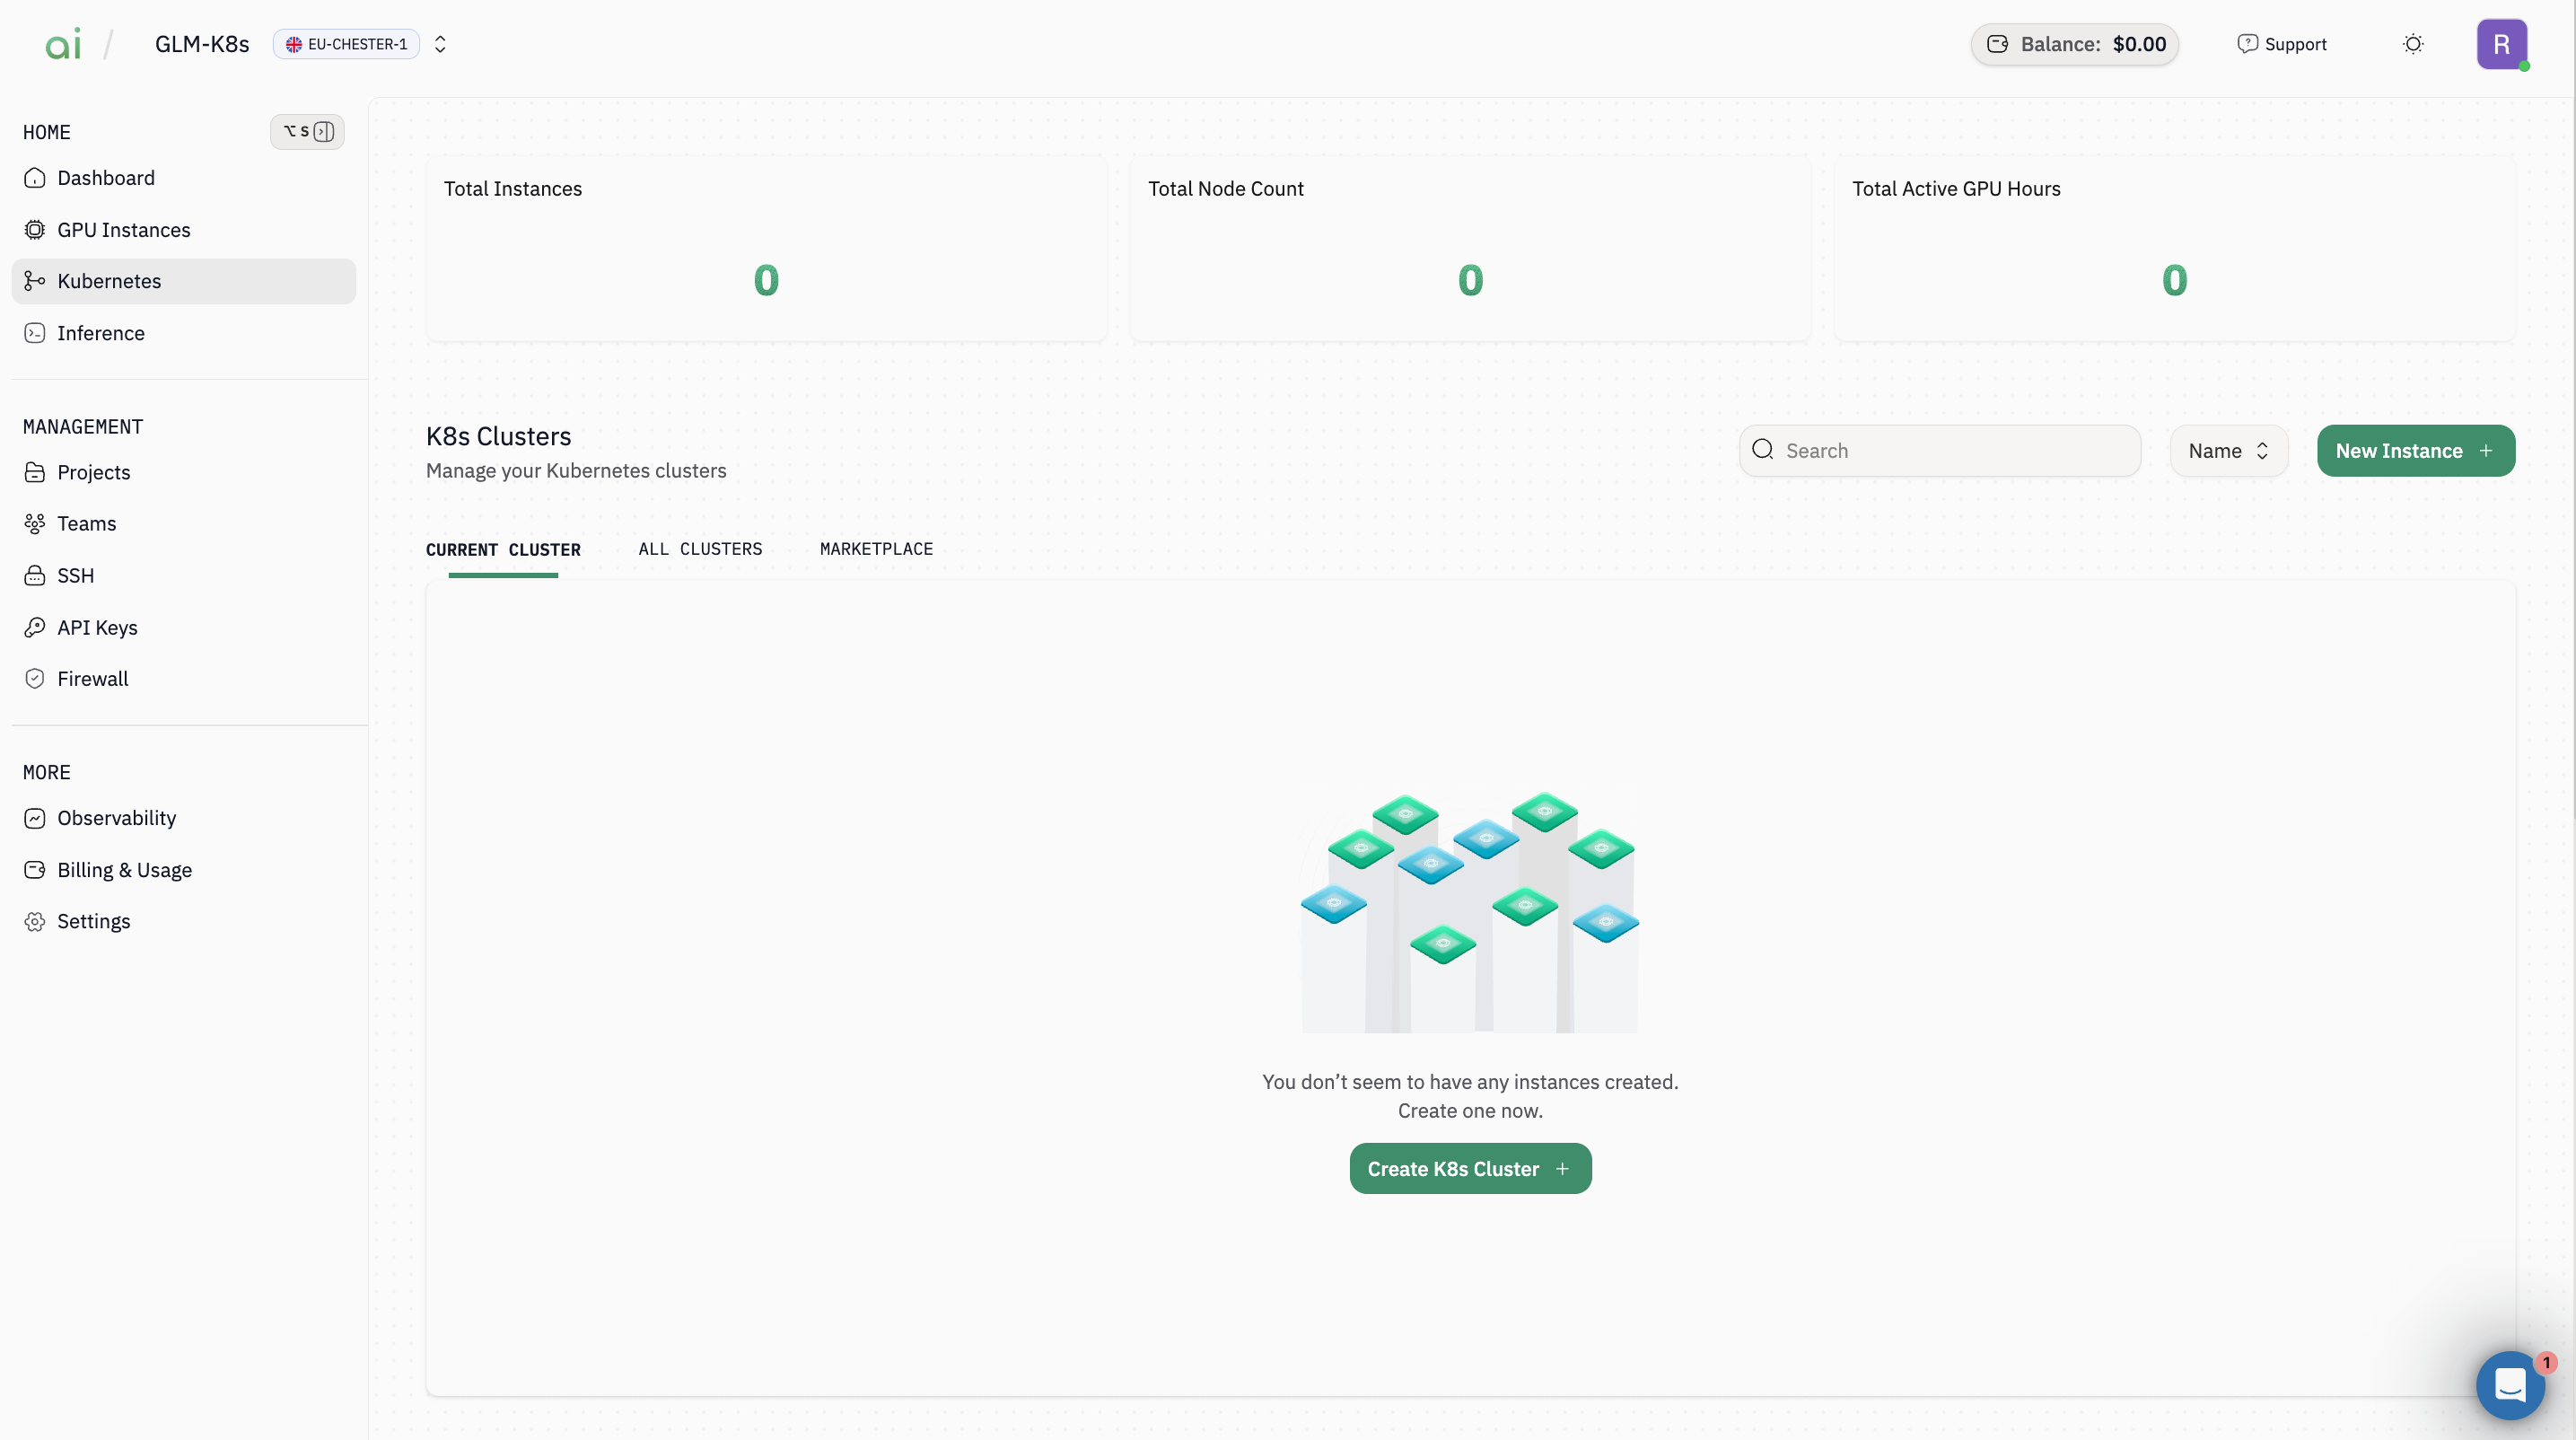
Step 1: Start cluster creation
- In the left sidebar, click Kubernetes
- Click Create K8s Cluster (or New Instance +)
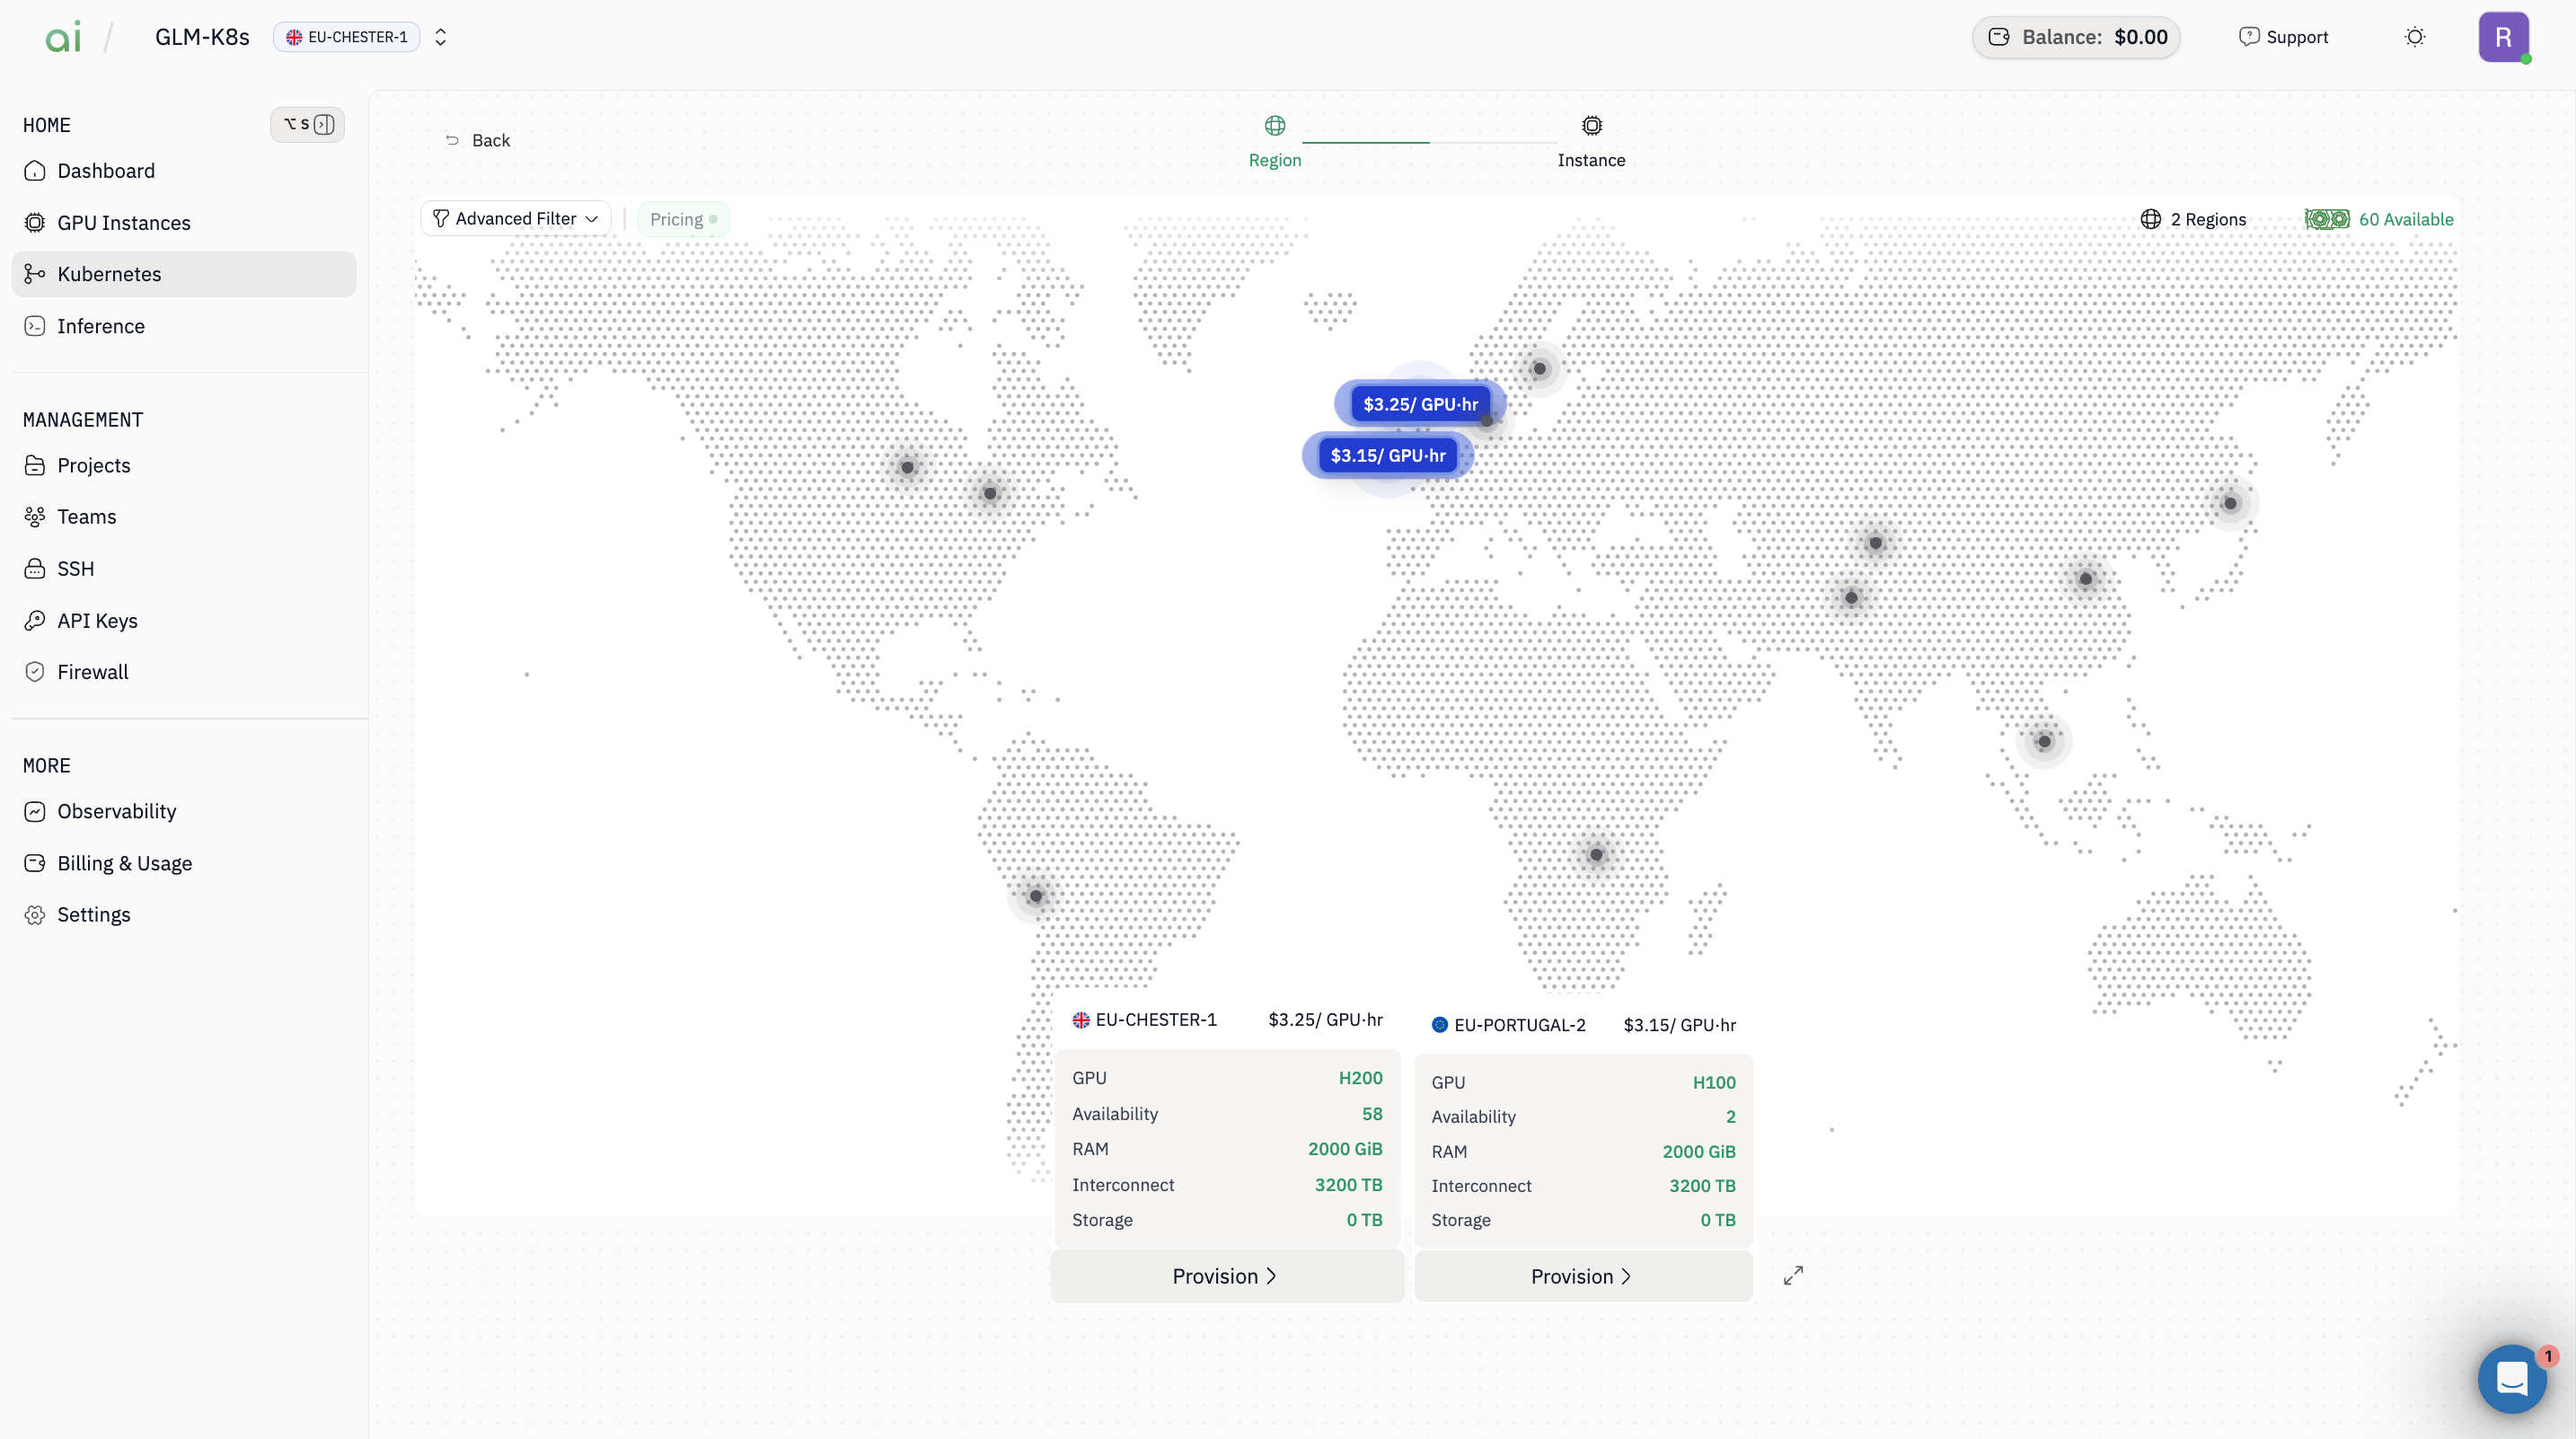
Step 2: Select region(s)
- On the Region map screen, choose the region(s) you want (example: EU-CHESTER-1, EU-PORTUGAL-2)
- Continue to the next step
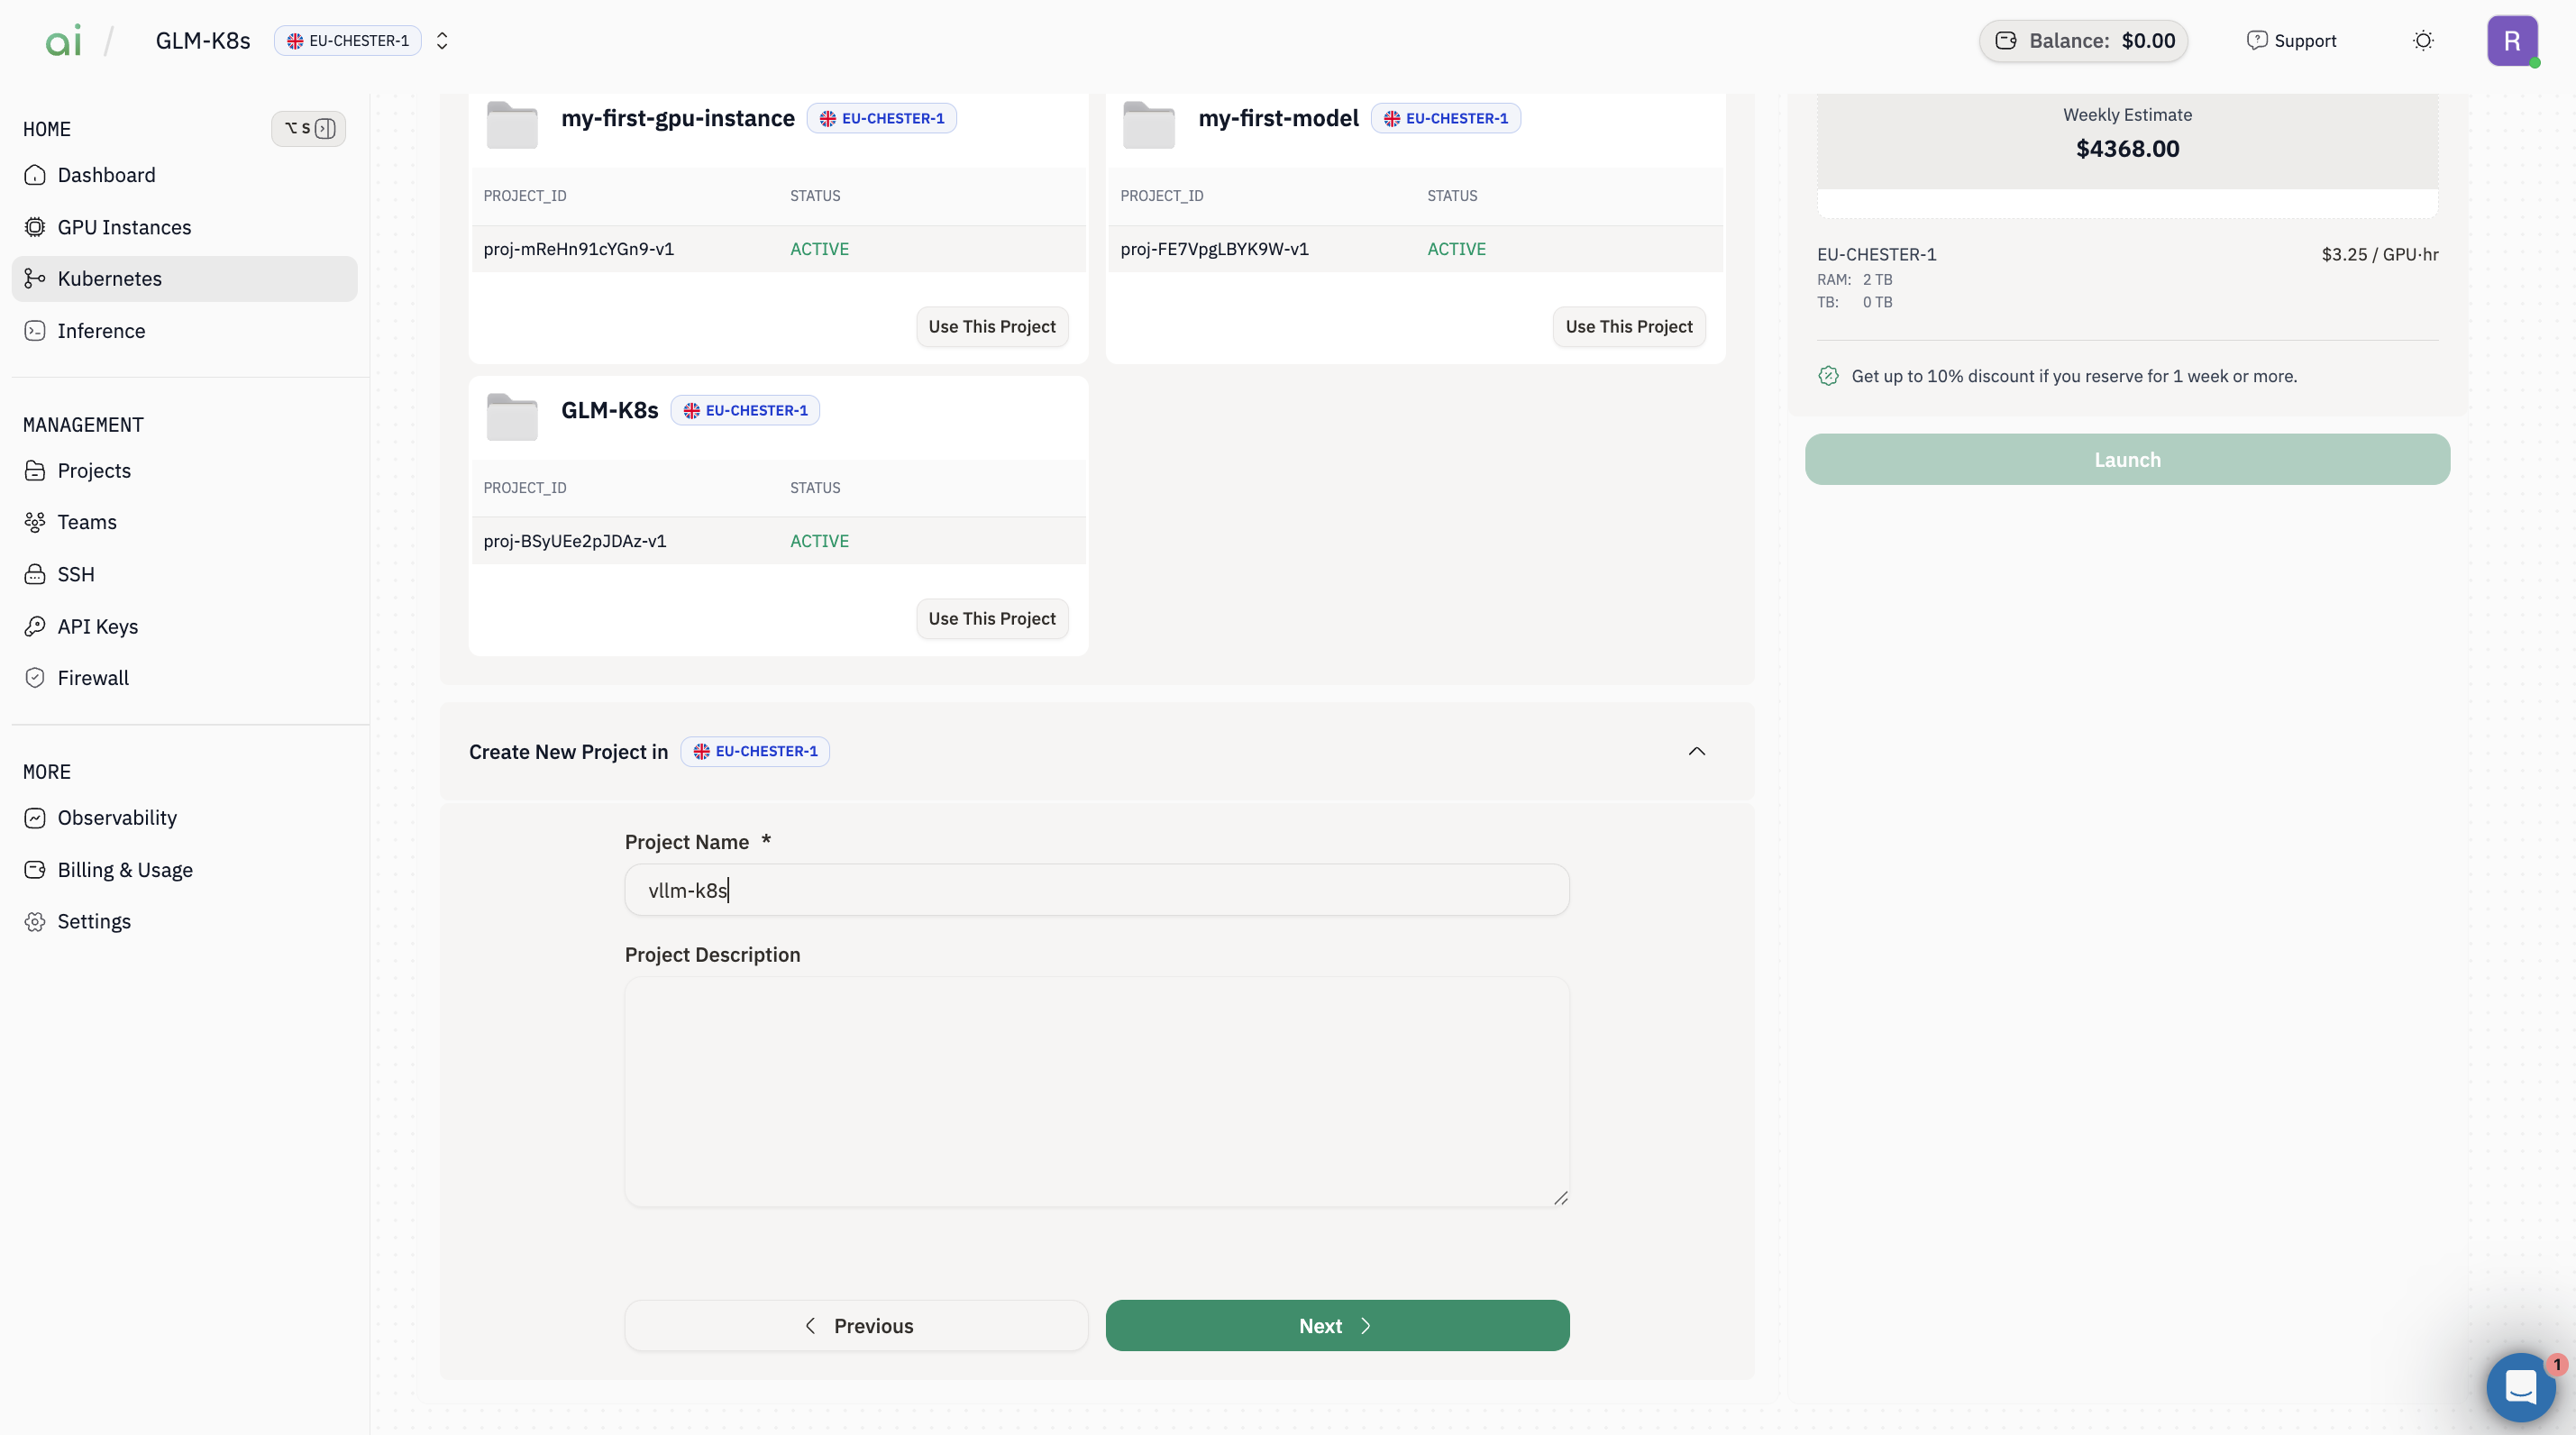
Step 3: Create / choose a Project
-
In Project step, either:
- Select an existing project and click Use This Project, or
- Create a new one under Create New Project
- Click Next
Step 4: Configure the cluster
On the Config step (cluster config form), set:-
Cluster Name (e.g.,
vllm-k8) -
Nodes (e.g.,
1) - Image (e.g., Ubuntu 22.04 Deep Learning Stack)
- SSH Key (select your key)
-
(Optional) keep defaults for:
- Kubernetes Version
- CNI Plugin (e.g.,
cilium) - **Pod CIDR / Service CIDR`
- Ensure Cluster Agent Enabled is checked (if your setup expects it)
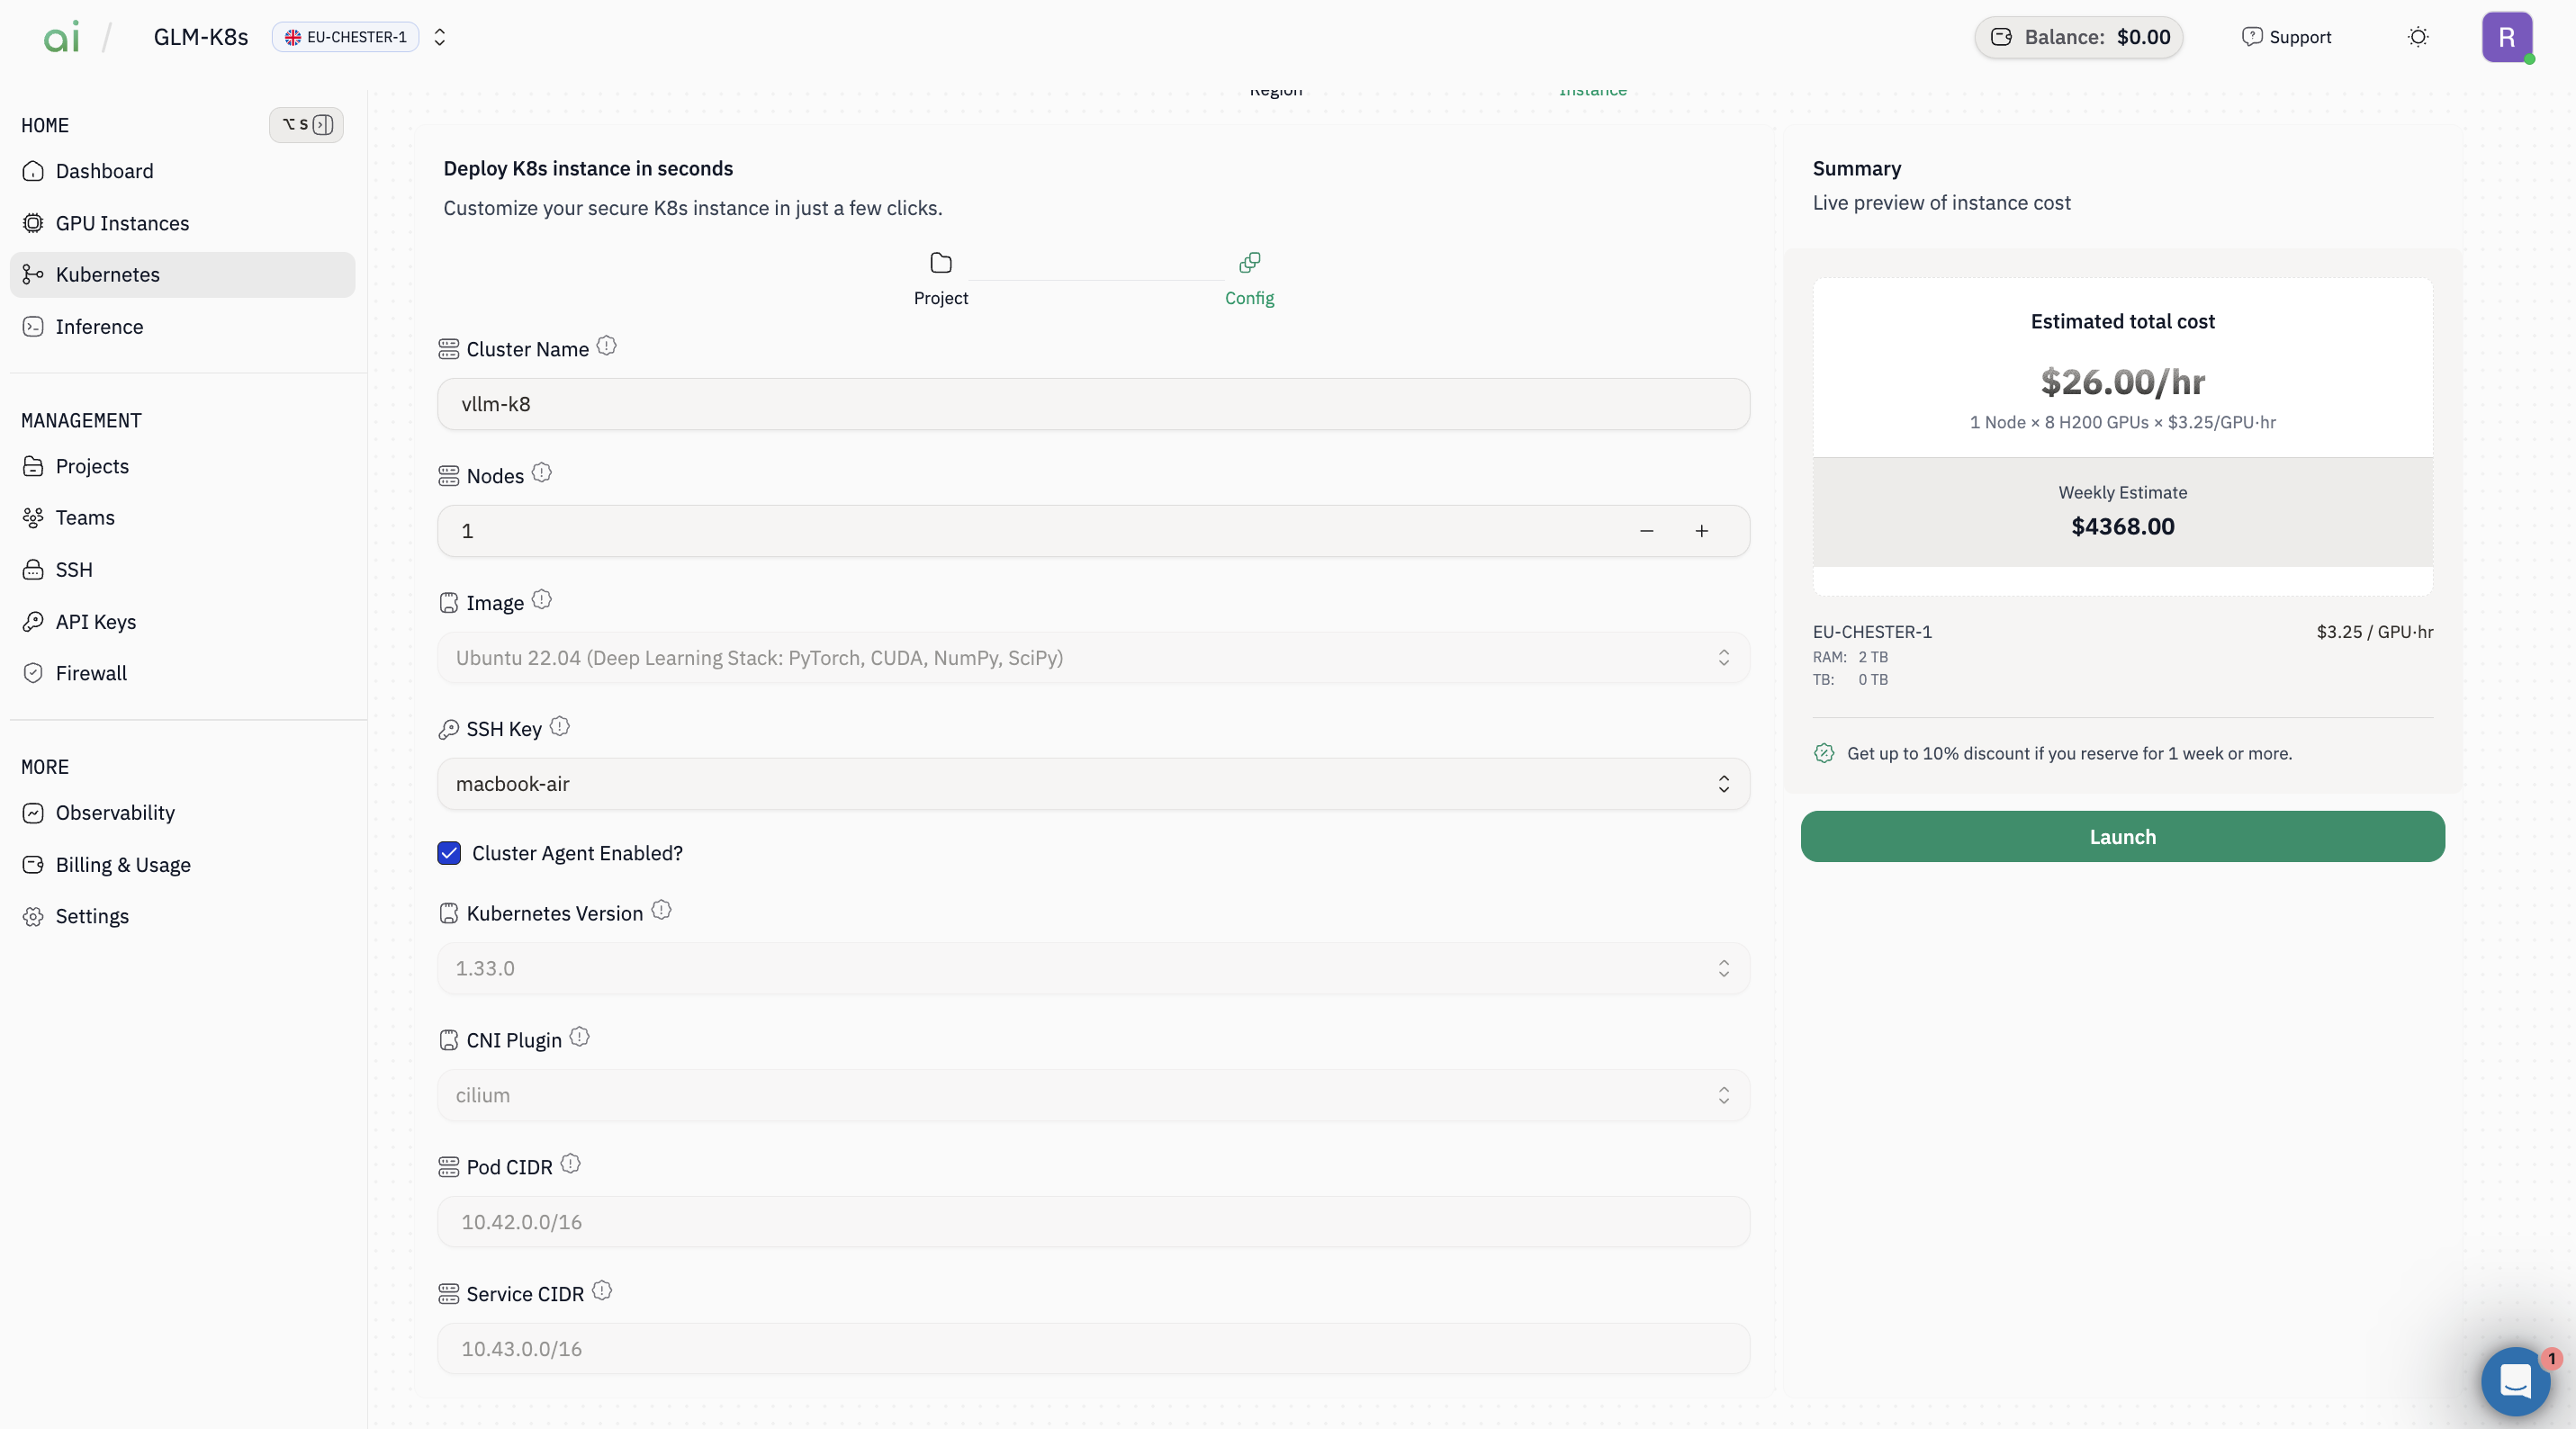
Step 5: Launch
- Review the Summary cost panel
- Click Launch
- Wait until the cluster status becomes ready/active.
B) Connect with kubectl
Step 1: Retrieve the Kubeconfig command
Once the cluster is created it will appear in theCurrent cluster section.
- Open the cluster details from the Current cluster list.
- Click
KubeConfig(or the KubeConfig button). A dialog appears containing a command you can run from your workstation to print the admin kubeconfig.
Copy command or copy the command manually.
Important:Use the exact host and user shown in the dialog. Replace<path-to-your-ssh-private-key>with the path to your private key on your workstation.
Step 2: Save the kubeconfig locally and connect with kubectl
Run the SSH command (copied in Step 5) locally and redirect the output to a file to save the admin kubeconfig.kubectl:
C) Install Marketplace apps (UI)
Go to Kubernetes → Marketplace.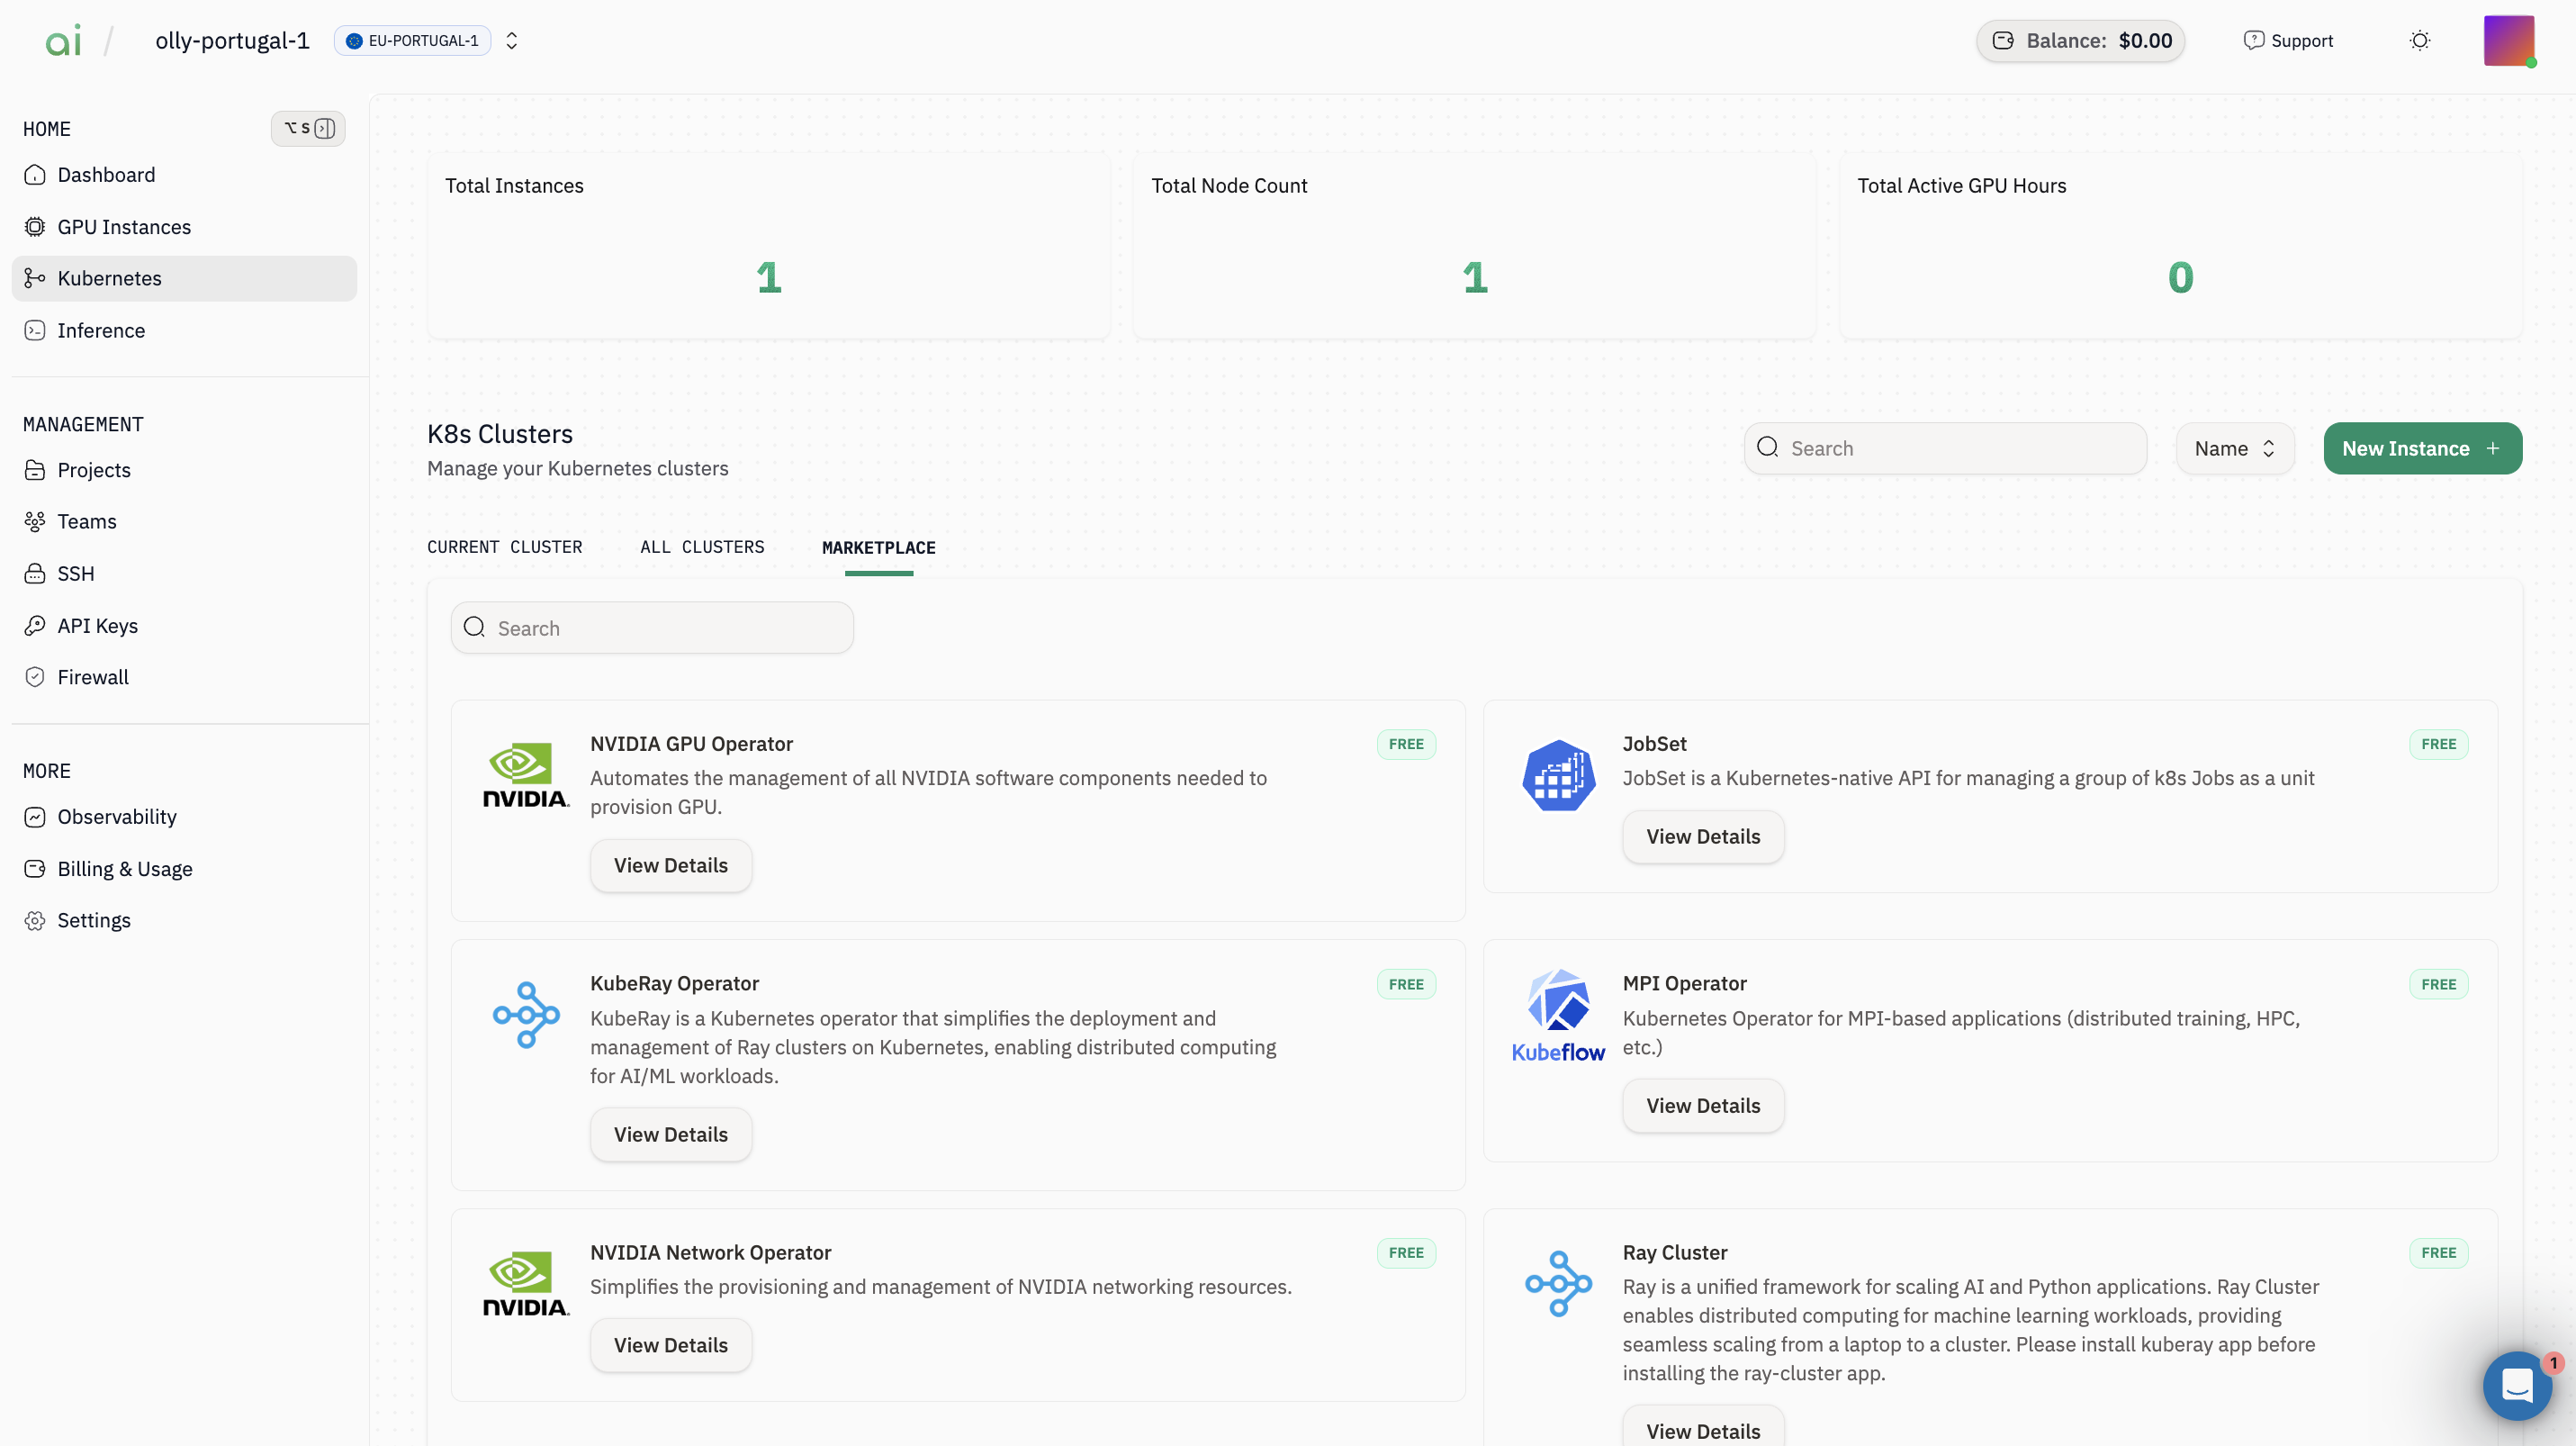
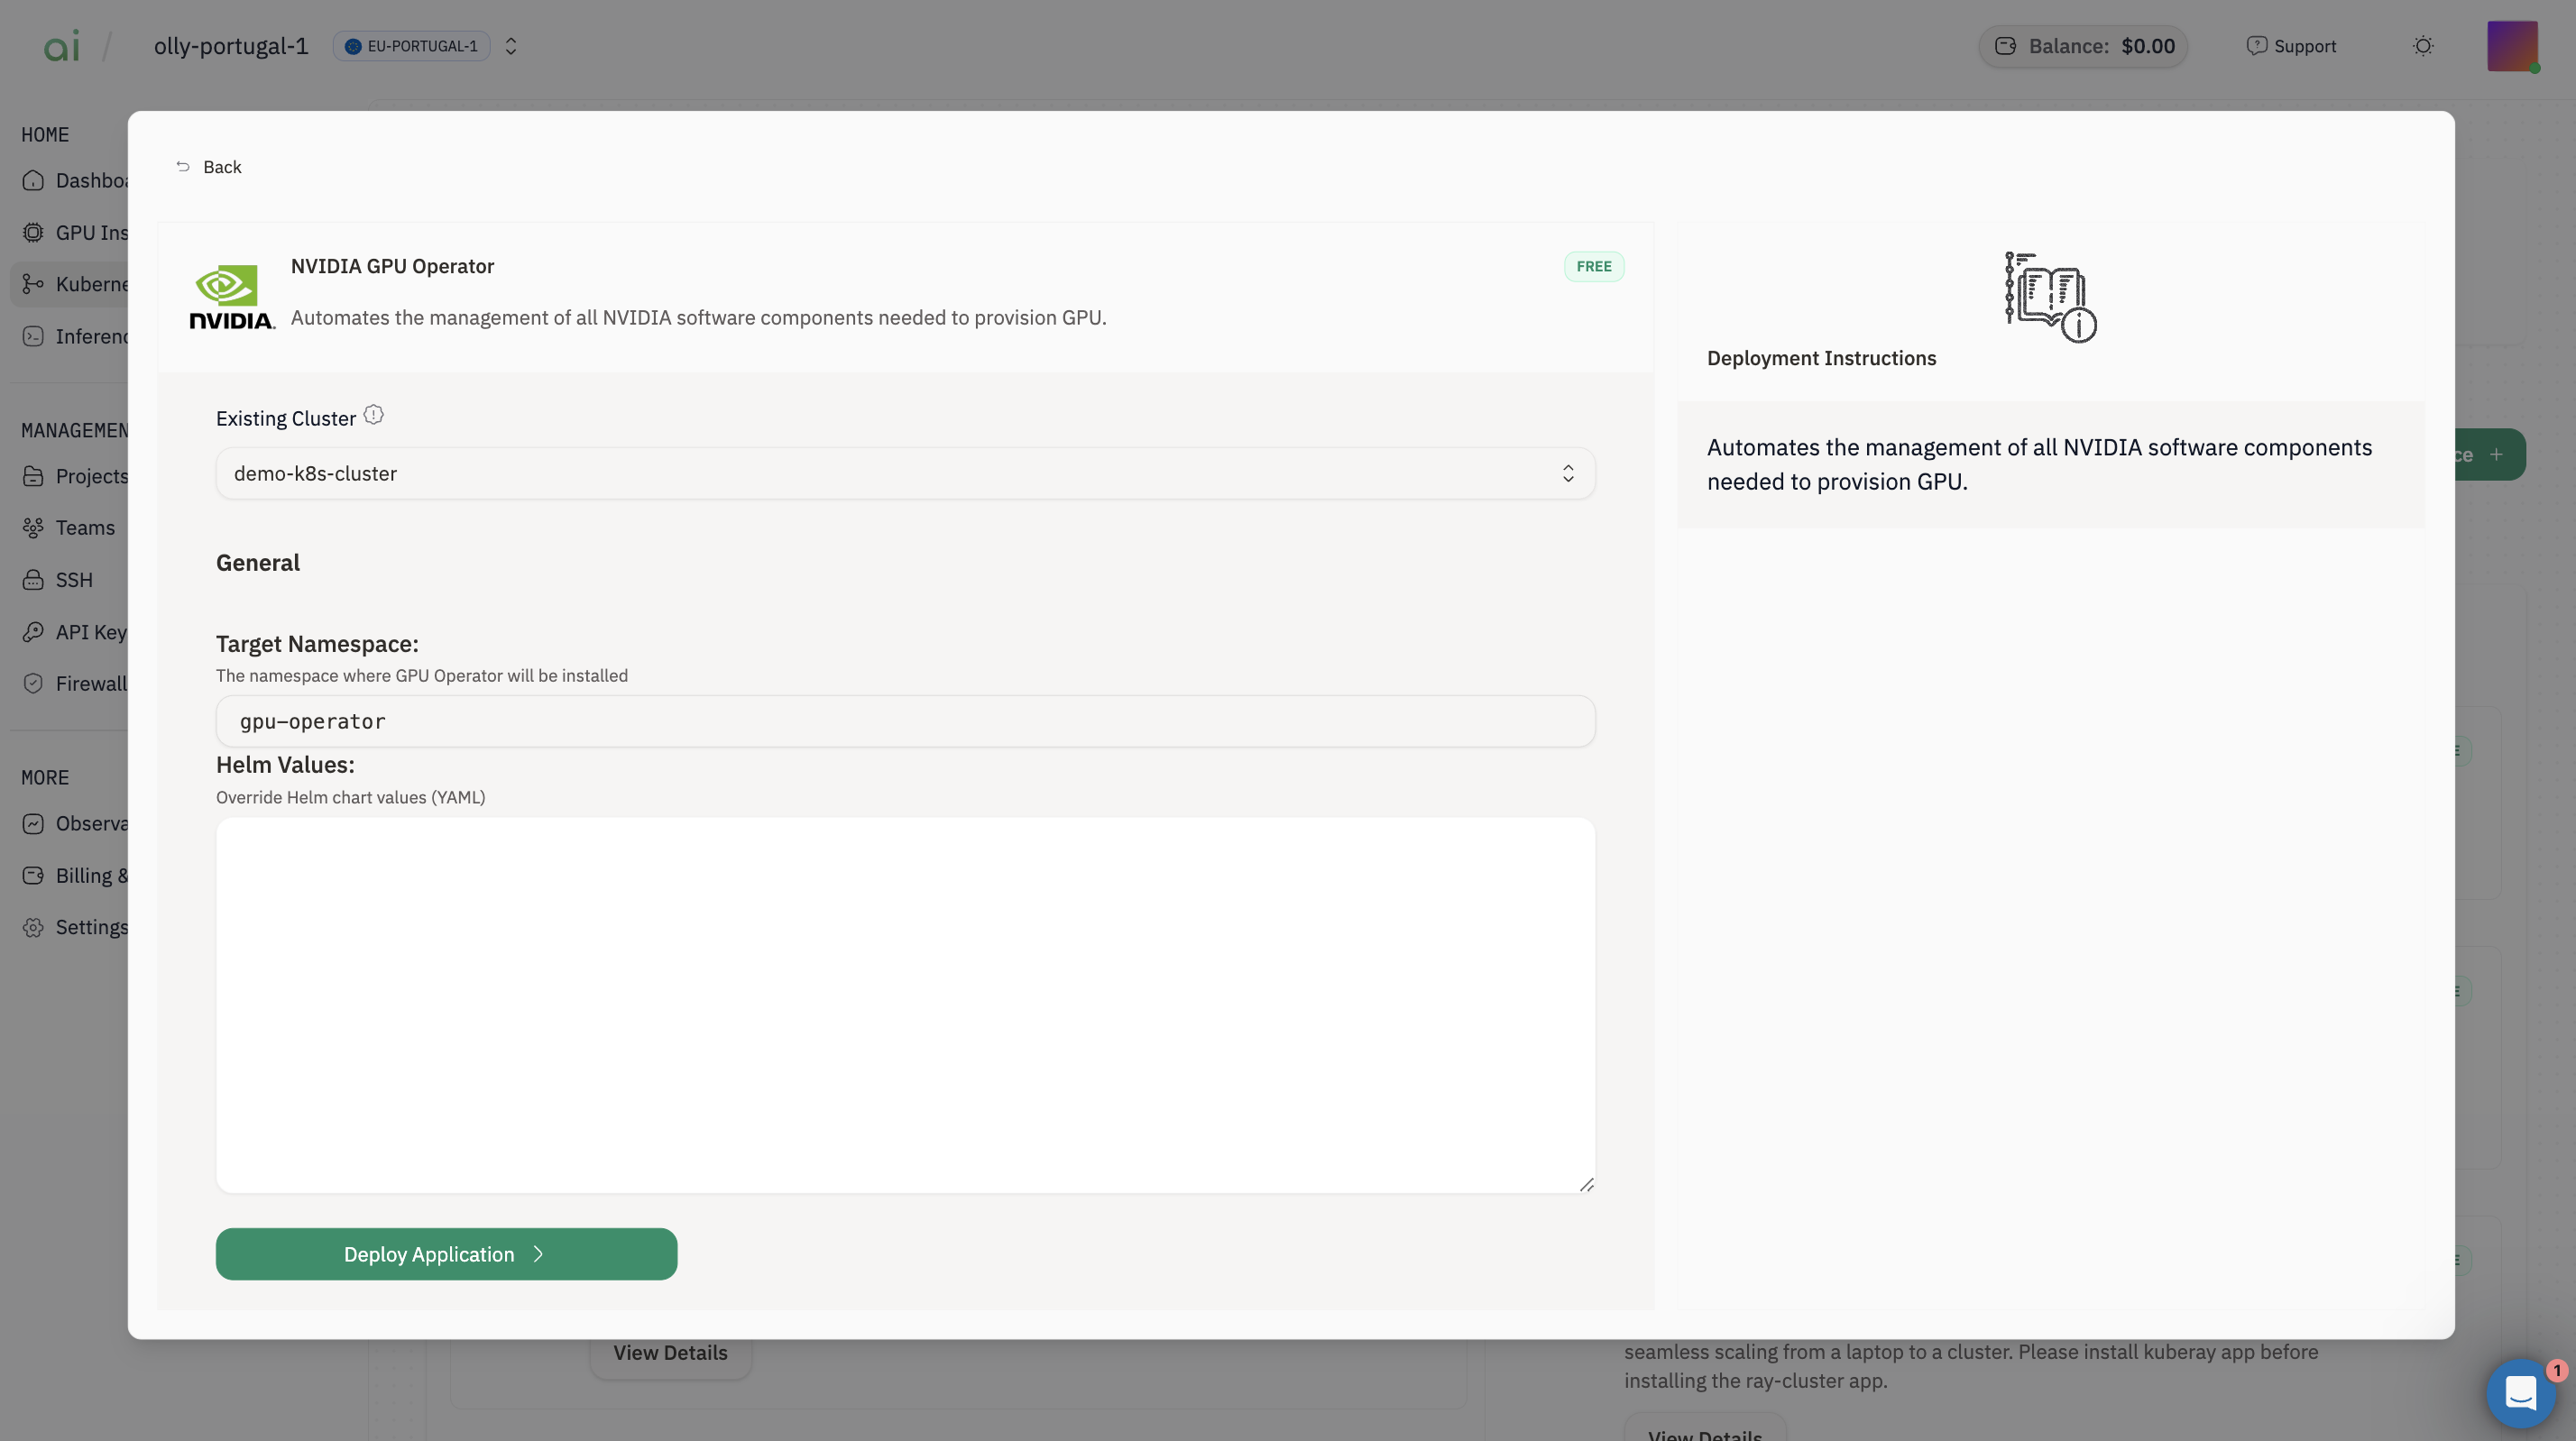
Step 1: Install NVIDIA GPU Operator
- Find NVIDIA GPU Operator → click View Details
- Select Existing Cluster = your cluster (e.g.,
vllm-k8) - Leave Target Namespace as default (often
gpu-operator) - Click Deploy Application
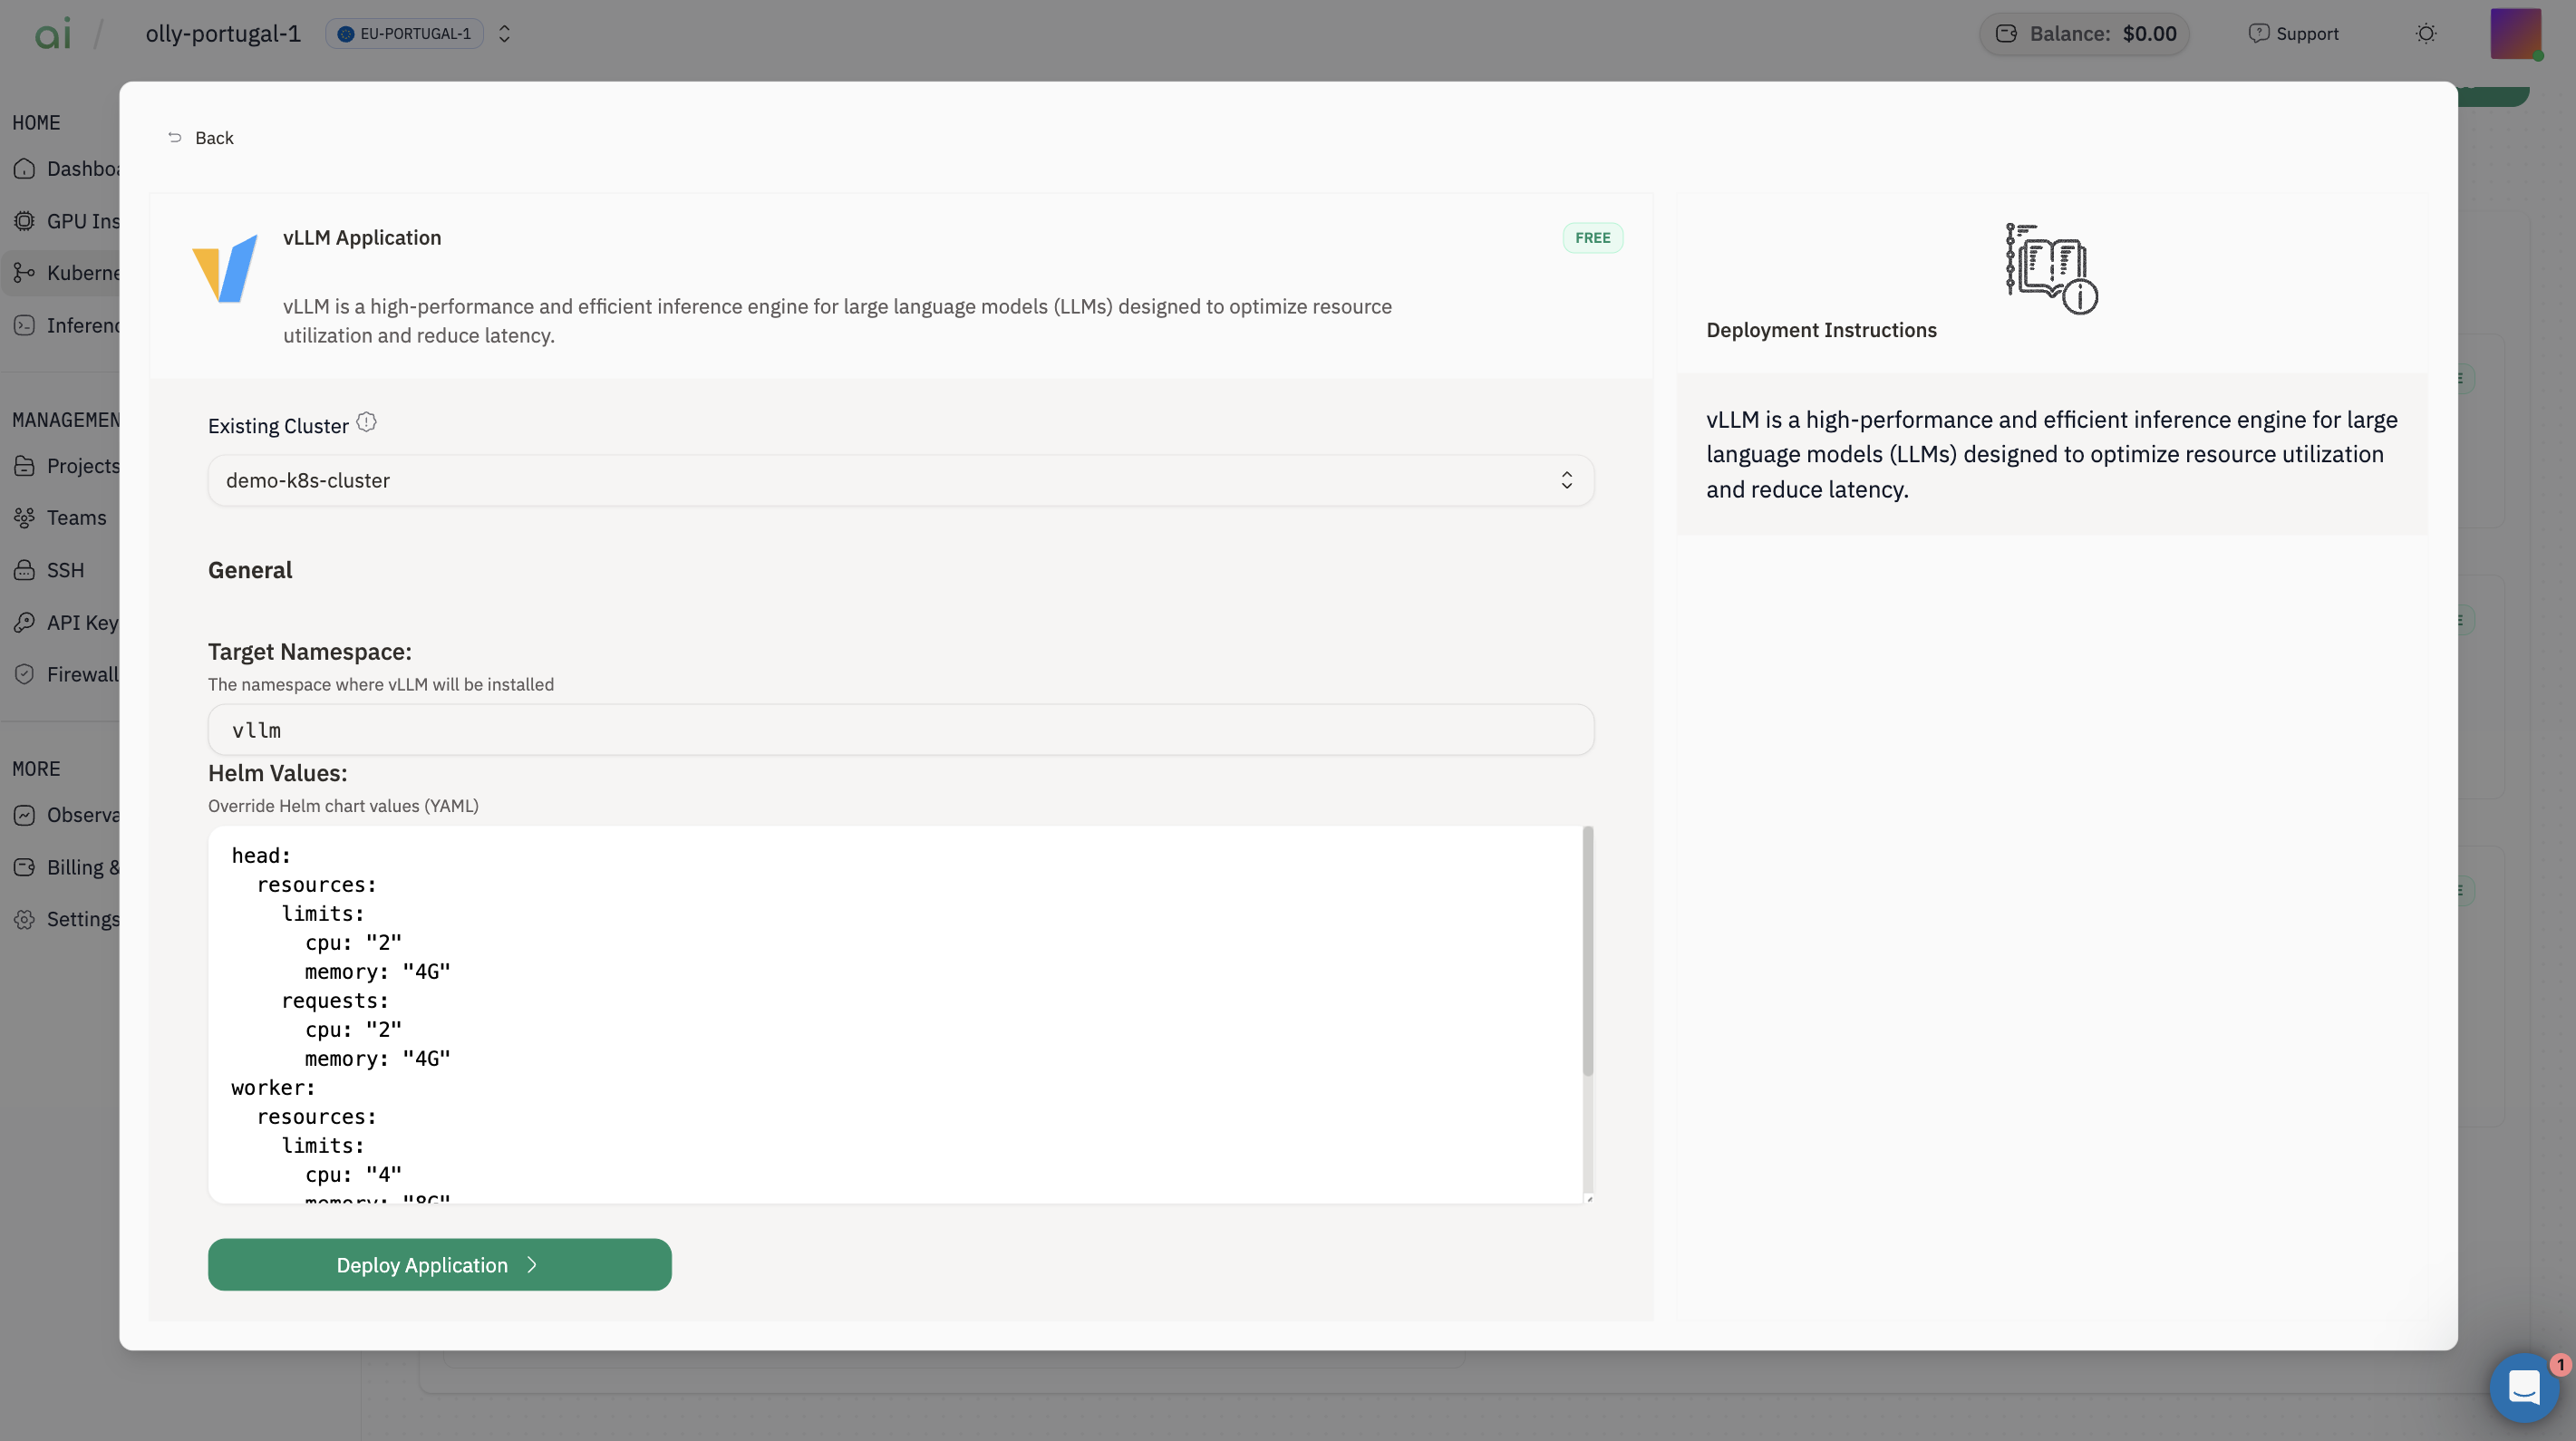
Step 2: Install vLLM Application
- Find vLLM Application → click View Details
- Select Existing Cluster
-
Target Namespace (example shown):
vllm -
Adjust Helm Values if needed (example defaults shown in your screenshot):
runtimeClassName: "nvidia"- a model like
facebook/opt-125m requestGPU: 1
- Click Deploy Application
D) Get the vLLM endpoint
Step 1: Identify the Service name
List Services in thevllm namespace and note the vLLM service name (often something like vllm, vllm-service, or vllm-app):
Step 2: Fetch the NodePort and build the endpoint URL
Replace<service-name> with the Service name you found above, and replace <cluster-id> with your cluster ID (the same one in k8s-<cluster-id>.groundcontrol-aion.xyz).
Step 3: Confirm the API is reachable
Step 4: Send an inference request (OpenAI-compatible)
Chat Completions (recommended)
Set the model name. If you’re not sure, run/v1/models first and copy the returned id.