Step 1: Create Your Account
Start by navigating to AION’s login screen.- Click
Sign upto create a new account - Alternatively, use
Continue with Googlefor faster authentication
Step 2: Upload Your SSH Key
SSH keys enable secure access to your GPU instances. You’ll need to upload your public key before creating an instance.To upload your SSH key:
- In the left sidebar, navigate to
Management → SSH - Click to upload your
public SSH key - Give your key a memorable name or label for easy identification
SSH Key dropdown when creating instances.
Important:If you skip this step, you won’t see any SSH key options later. Simply return toManagement → SSH, upload your key, then continue with instance creation.

Step 3: Create Your GPU Instance
-
In the left sidebar, click
Home, then selectGPU Instances. You’ll see an empty state with a greenCreate Instance +button in the center.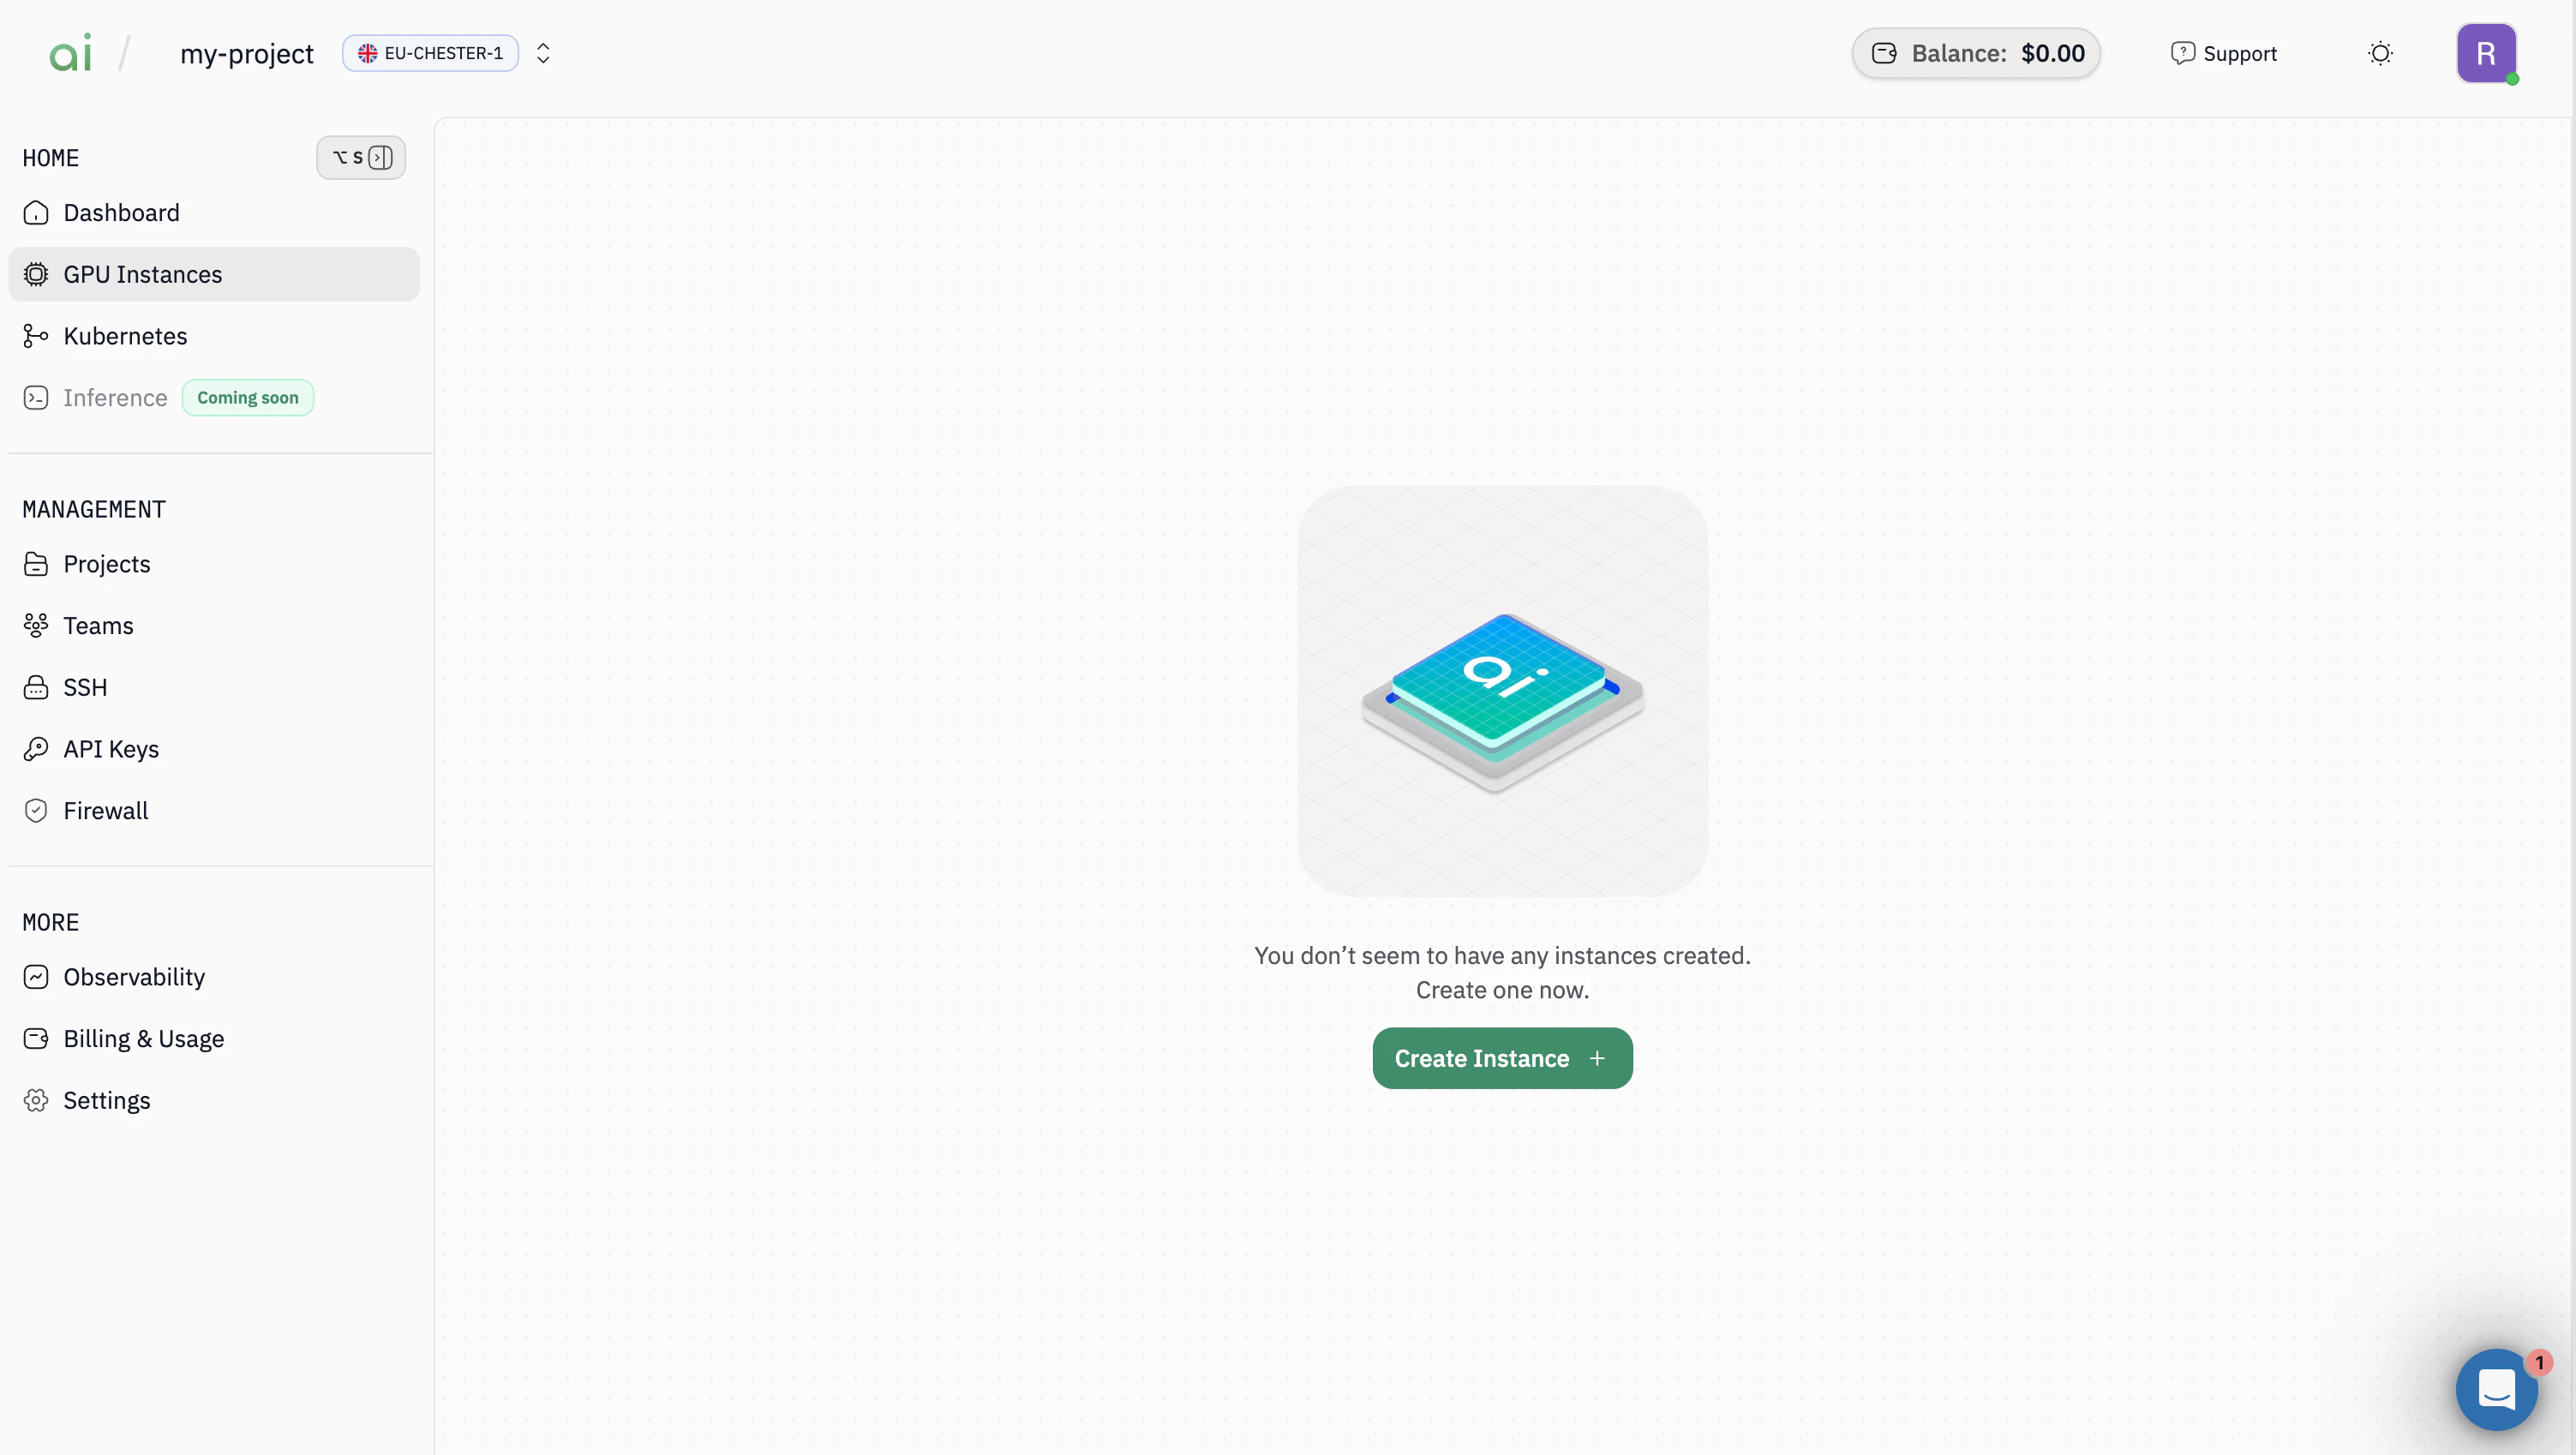
-
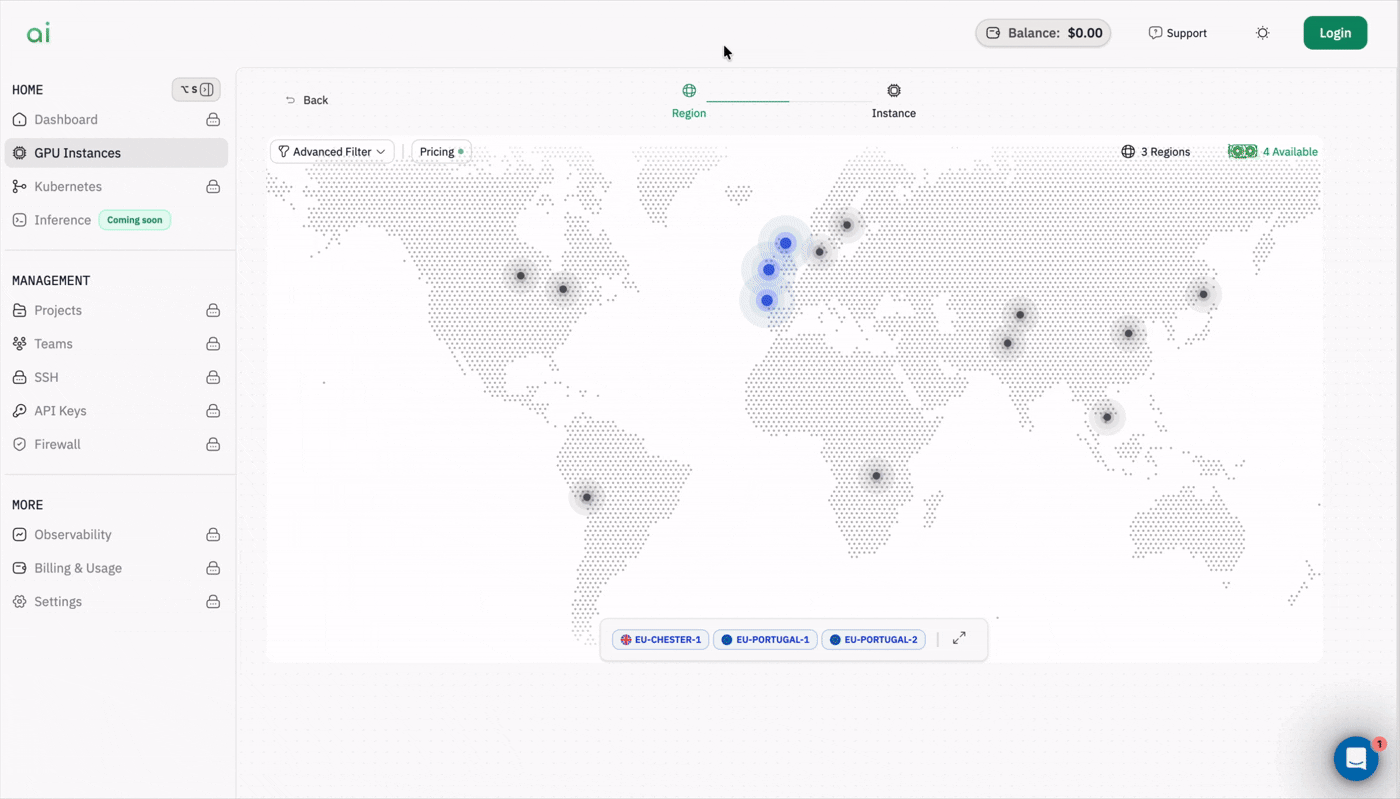
Click on the
Create Instance +to start provisioning a new instance. You’ll see an interactive world map with all available regions and their pricing.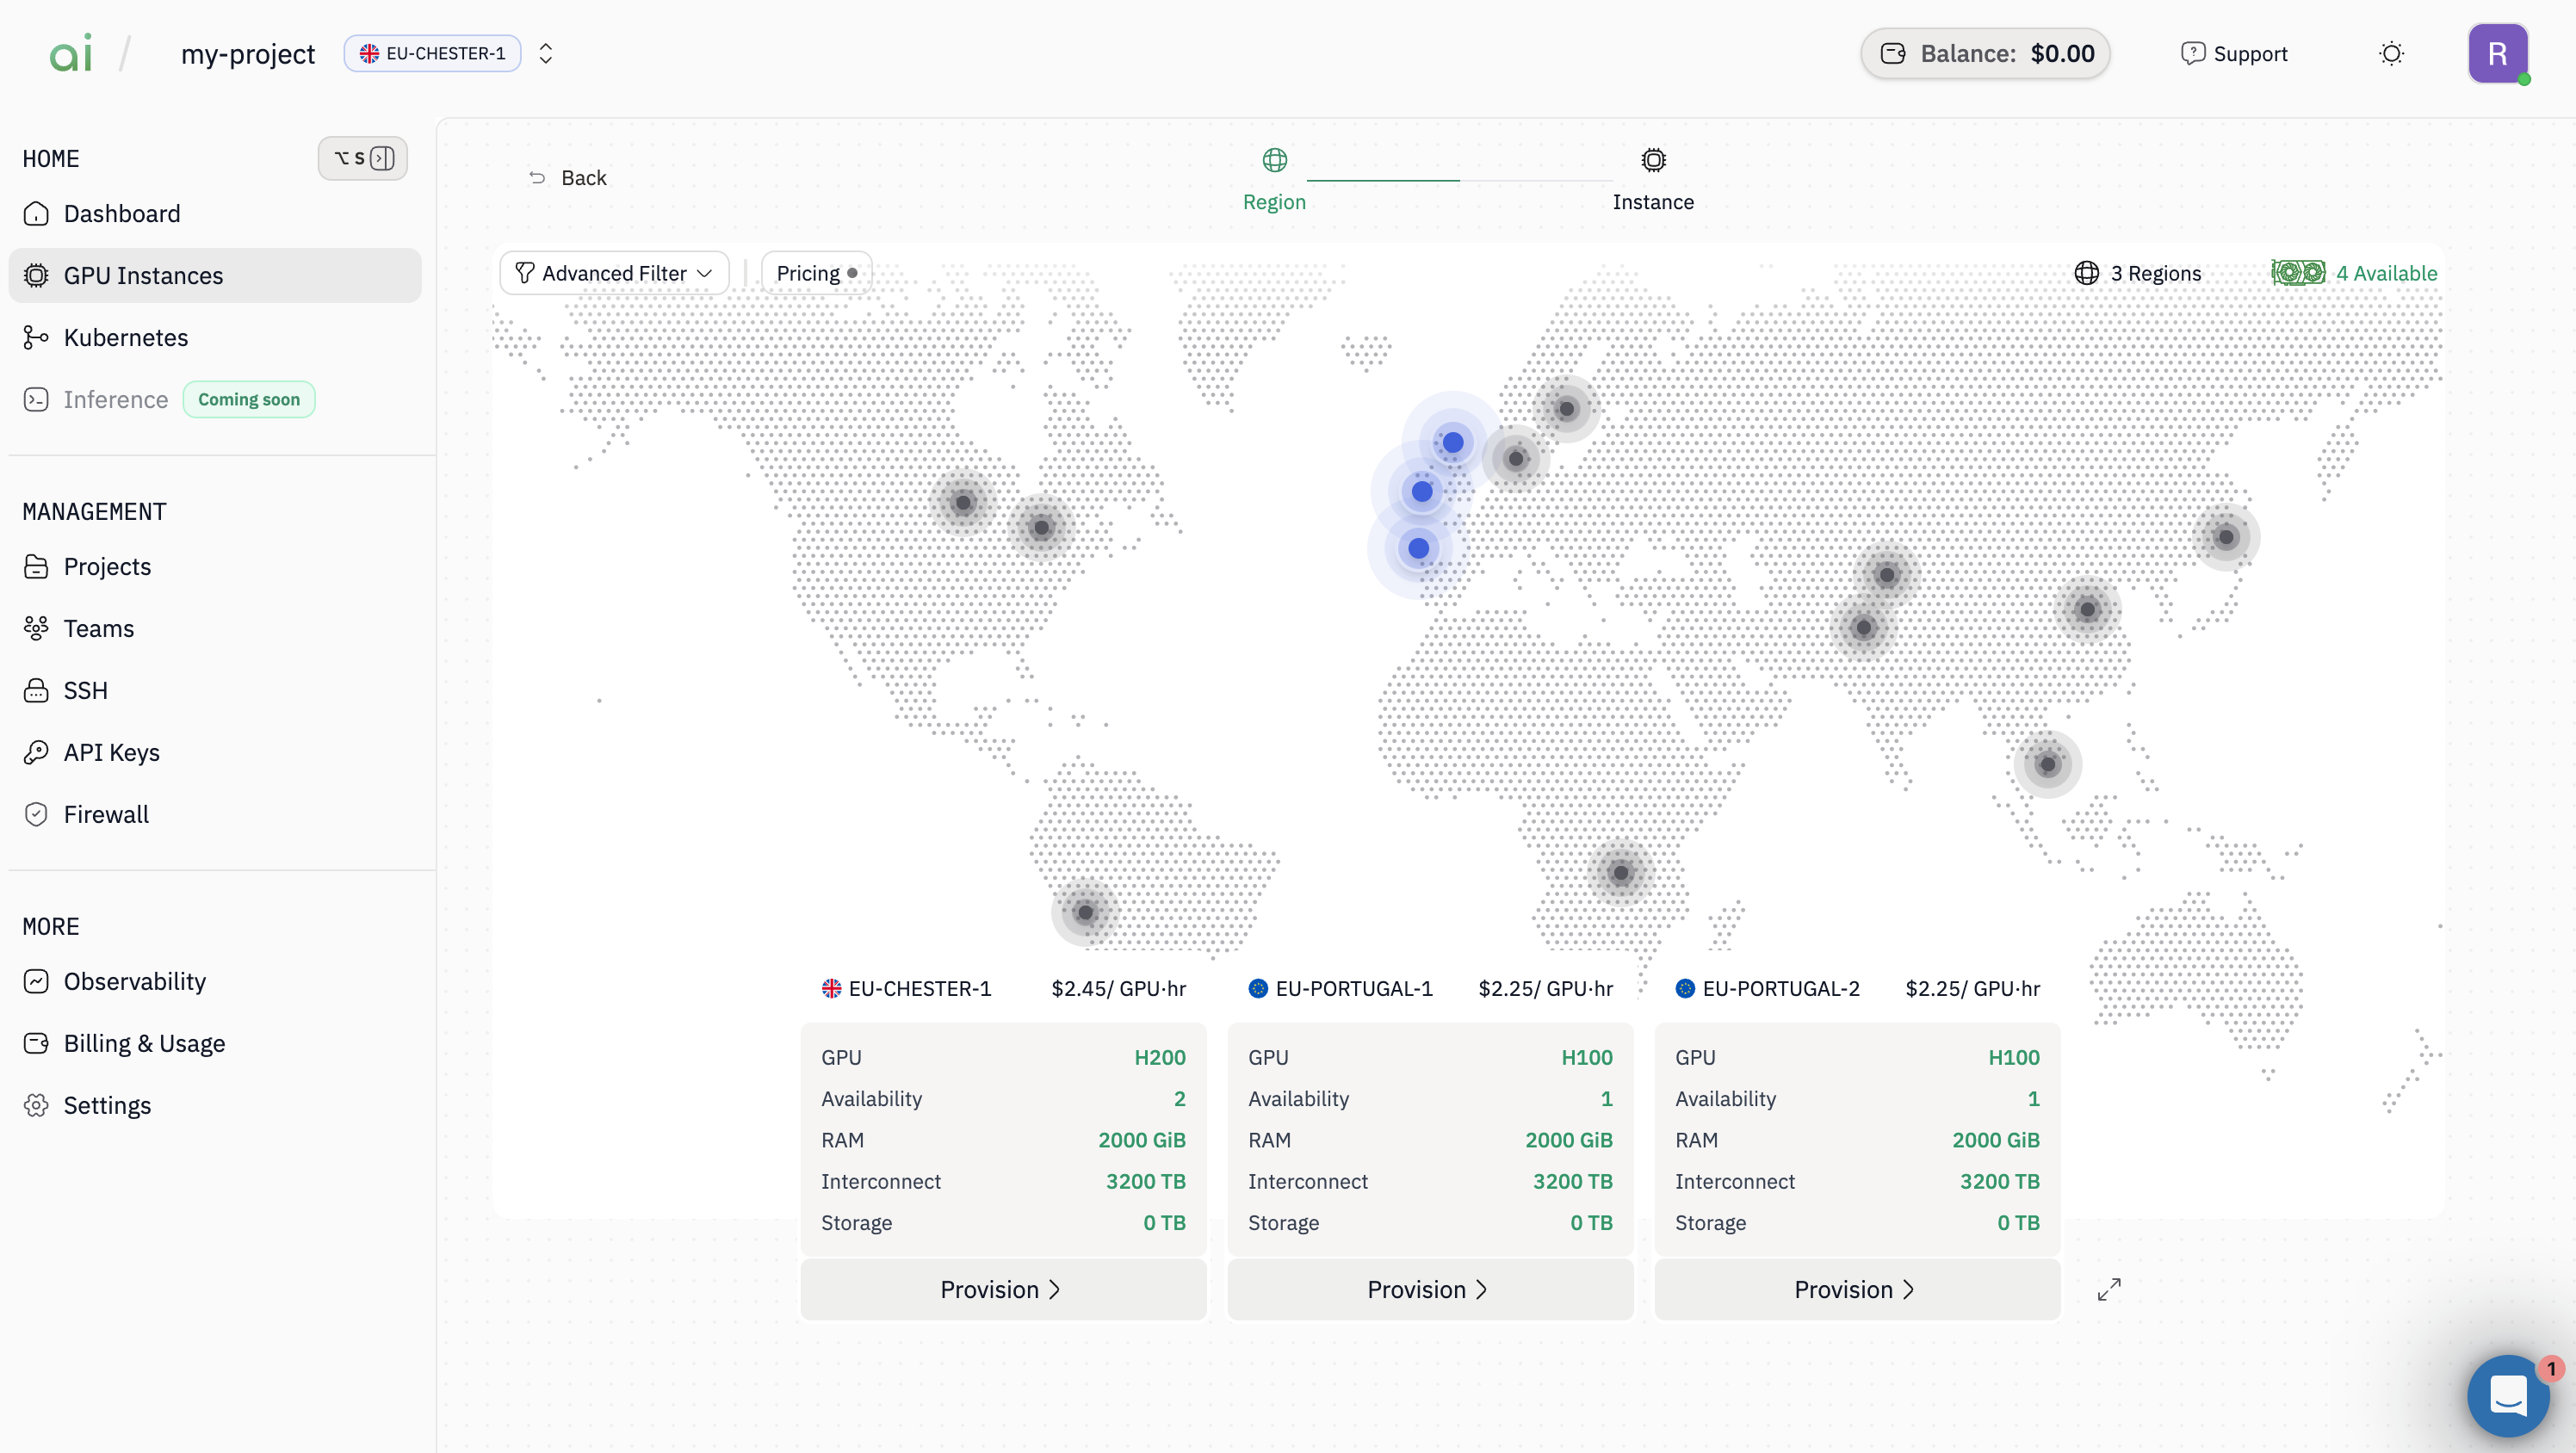
-
Review the available regions and their pricing and then Click
Provisionon your chosen region’s card.
-
After selecting a region, you’ll need to select or create a new project. You can use an existing project or create a new project.
In the
Create New Projectsection, enter:Project Name(required)Project Description(optional but helpful for organizing workloads)
Nextto proceed to configuration.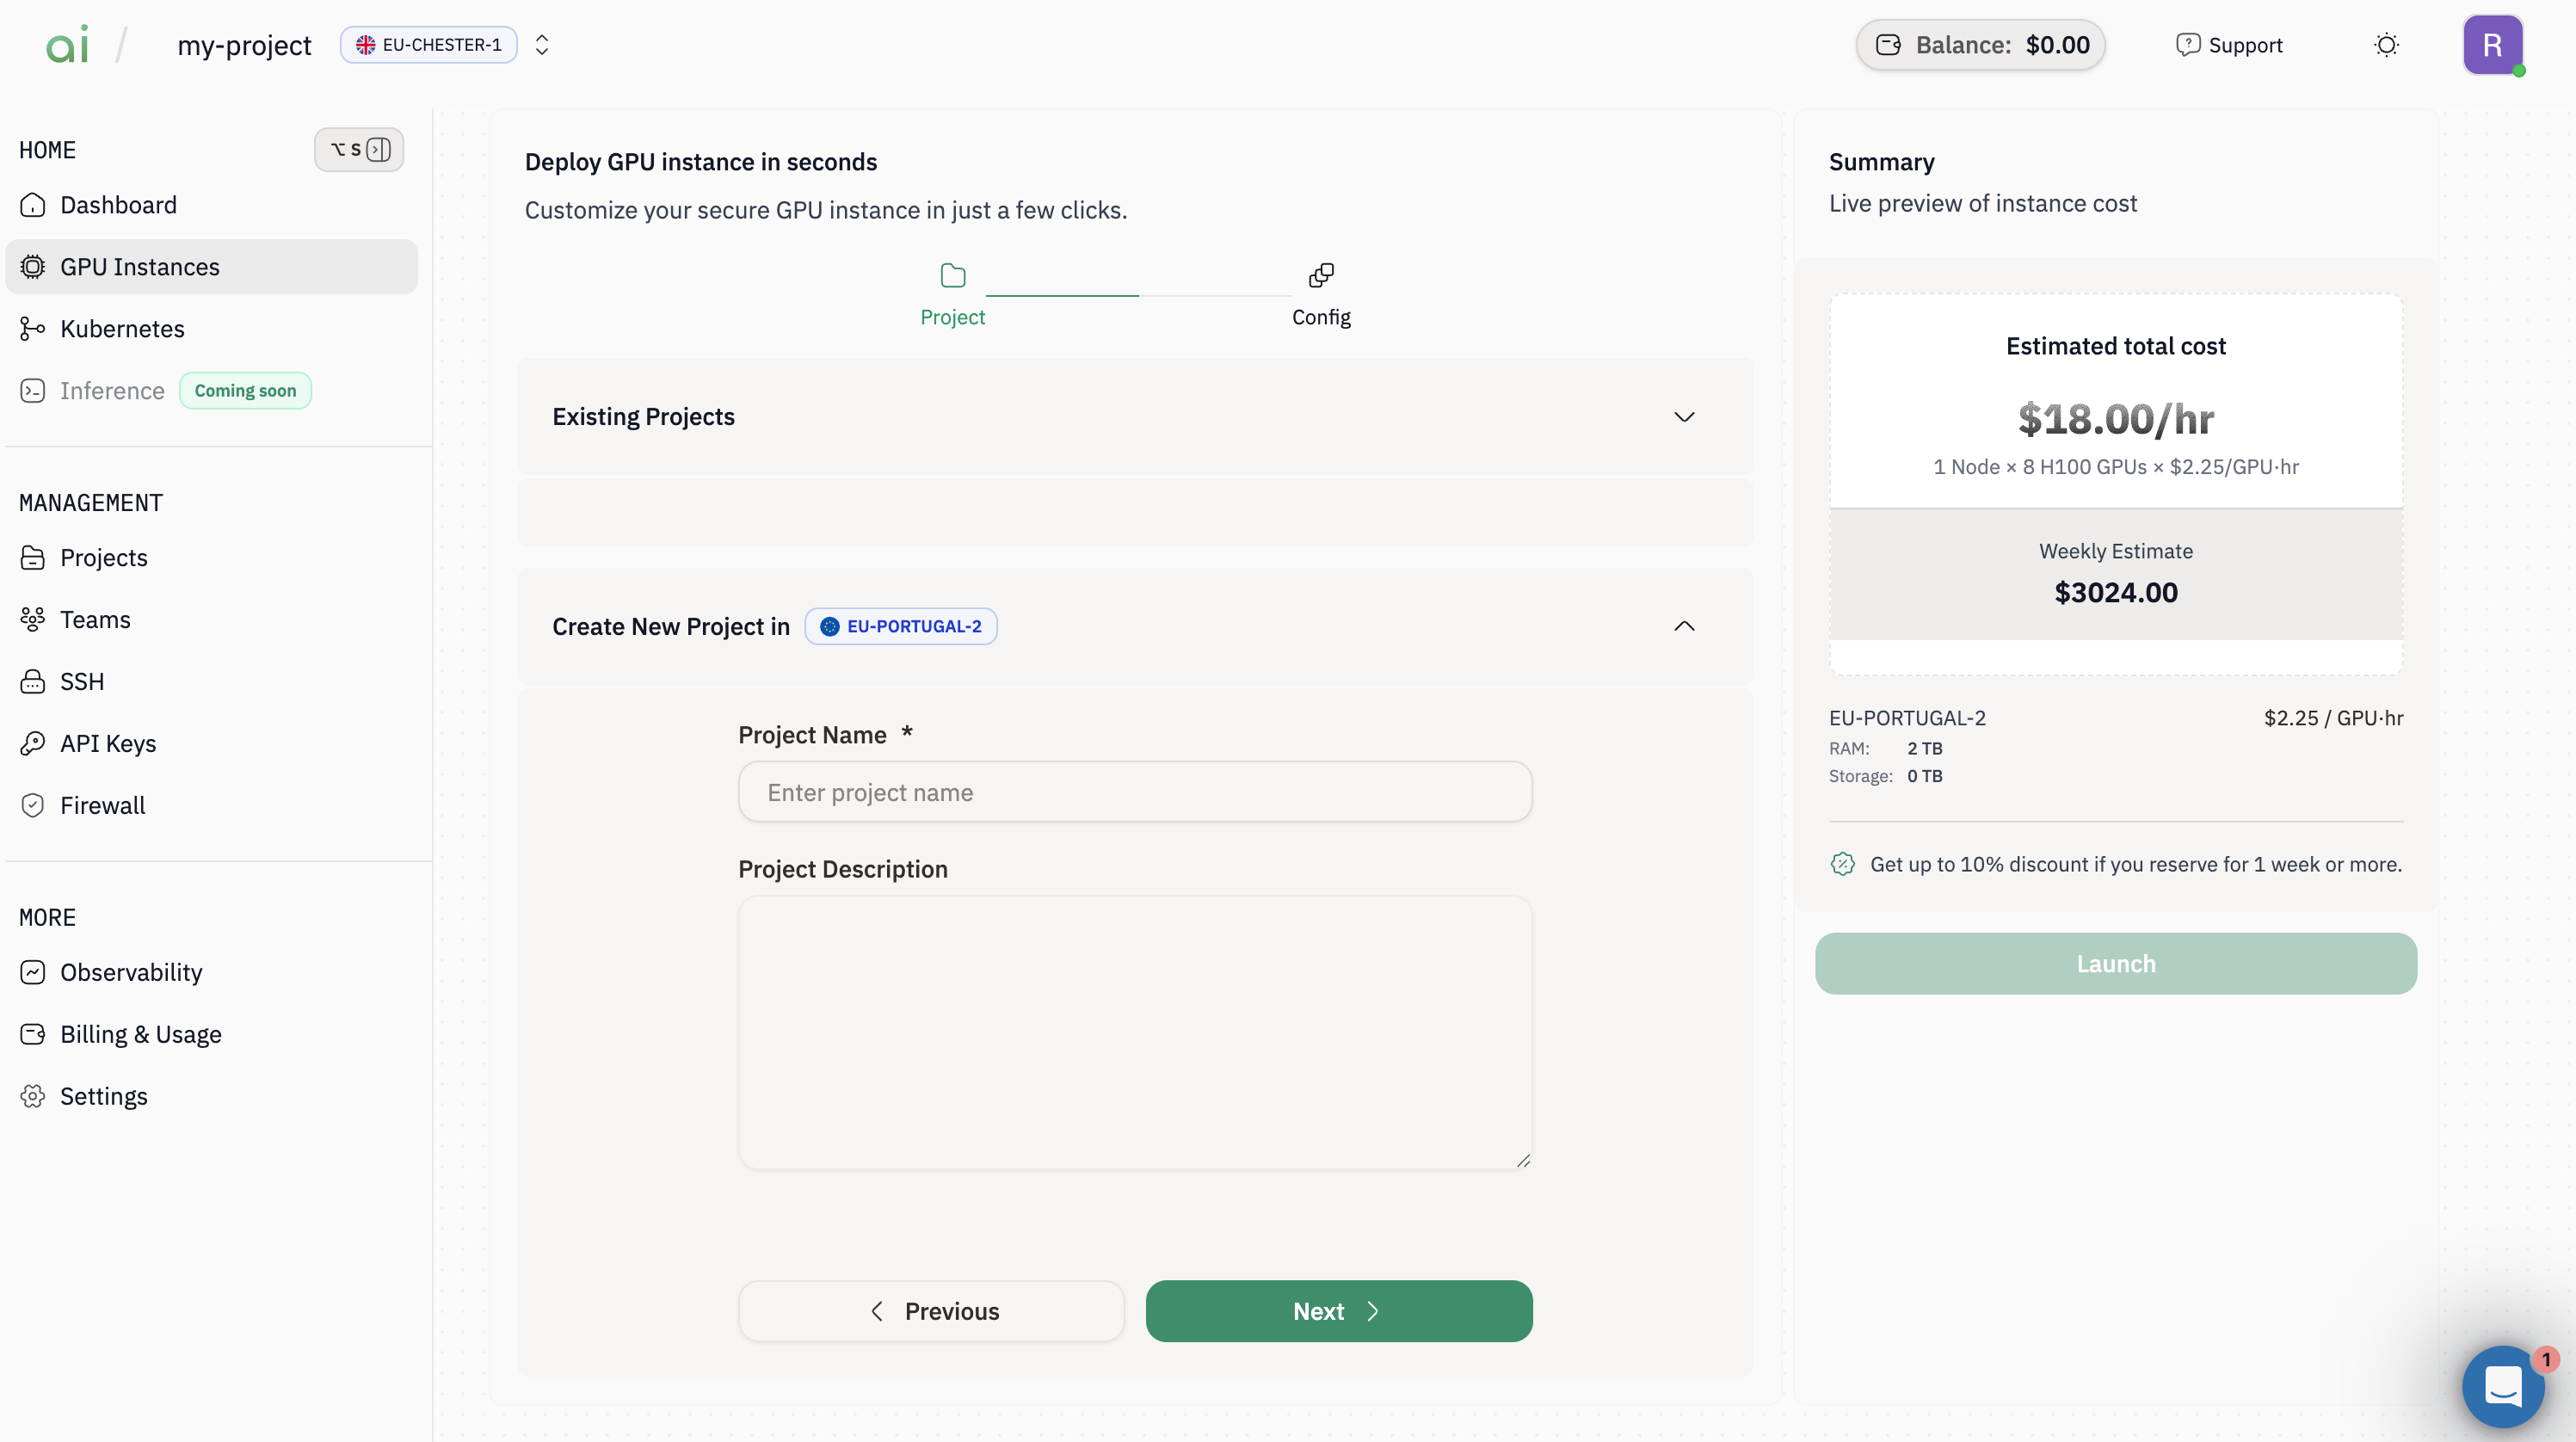
-
Now you’ll define and configure the specifics of your GPU instance. Key configuration fields:
Cluster NameChoose a name you’ll recognize in your instances list. NodesUse the – / + controls to set the number of machines in your cluster. ImageSelect a pre-configured operating system to launch your instance. SSH KeySelect the SSH key you uploaded in Step 2. 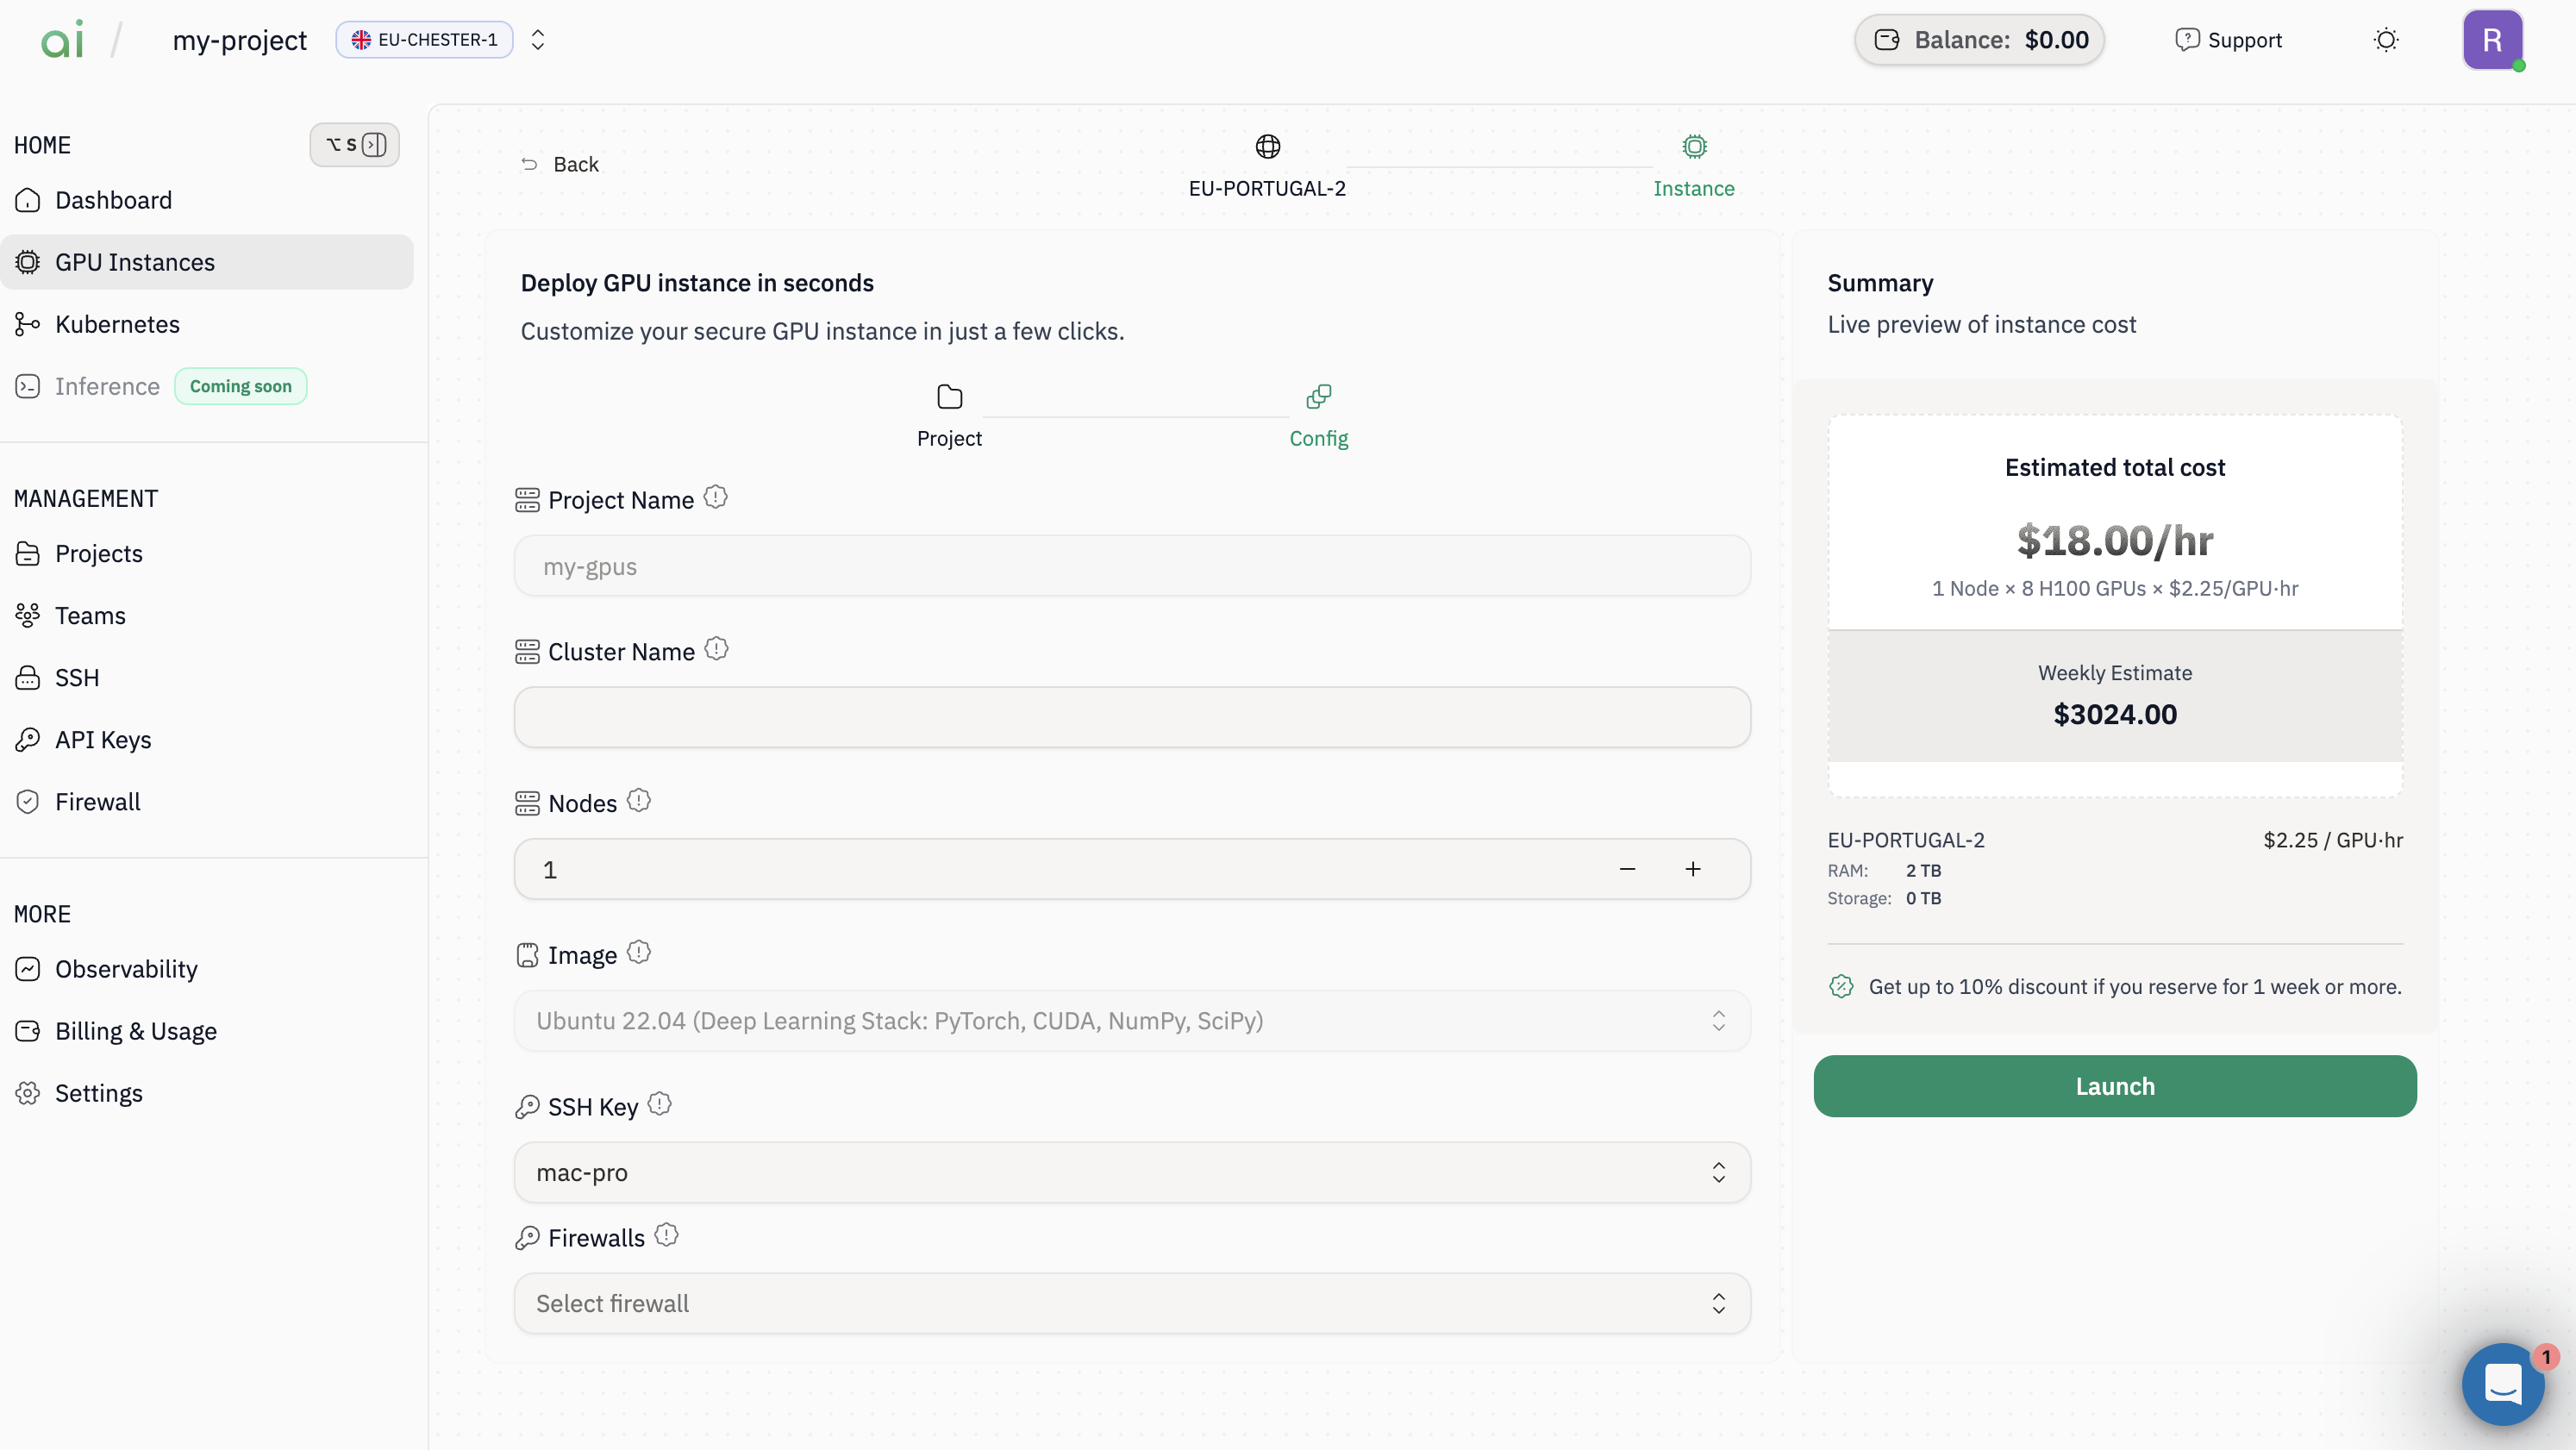
-
Review your configuration one final time, then click the green
Launchbutton in the Summary panel.
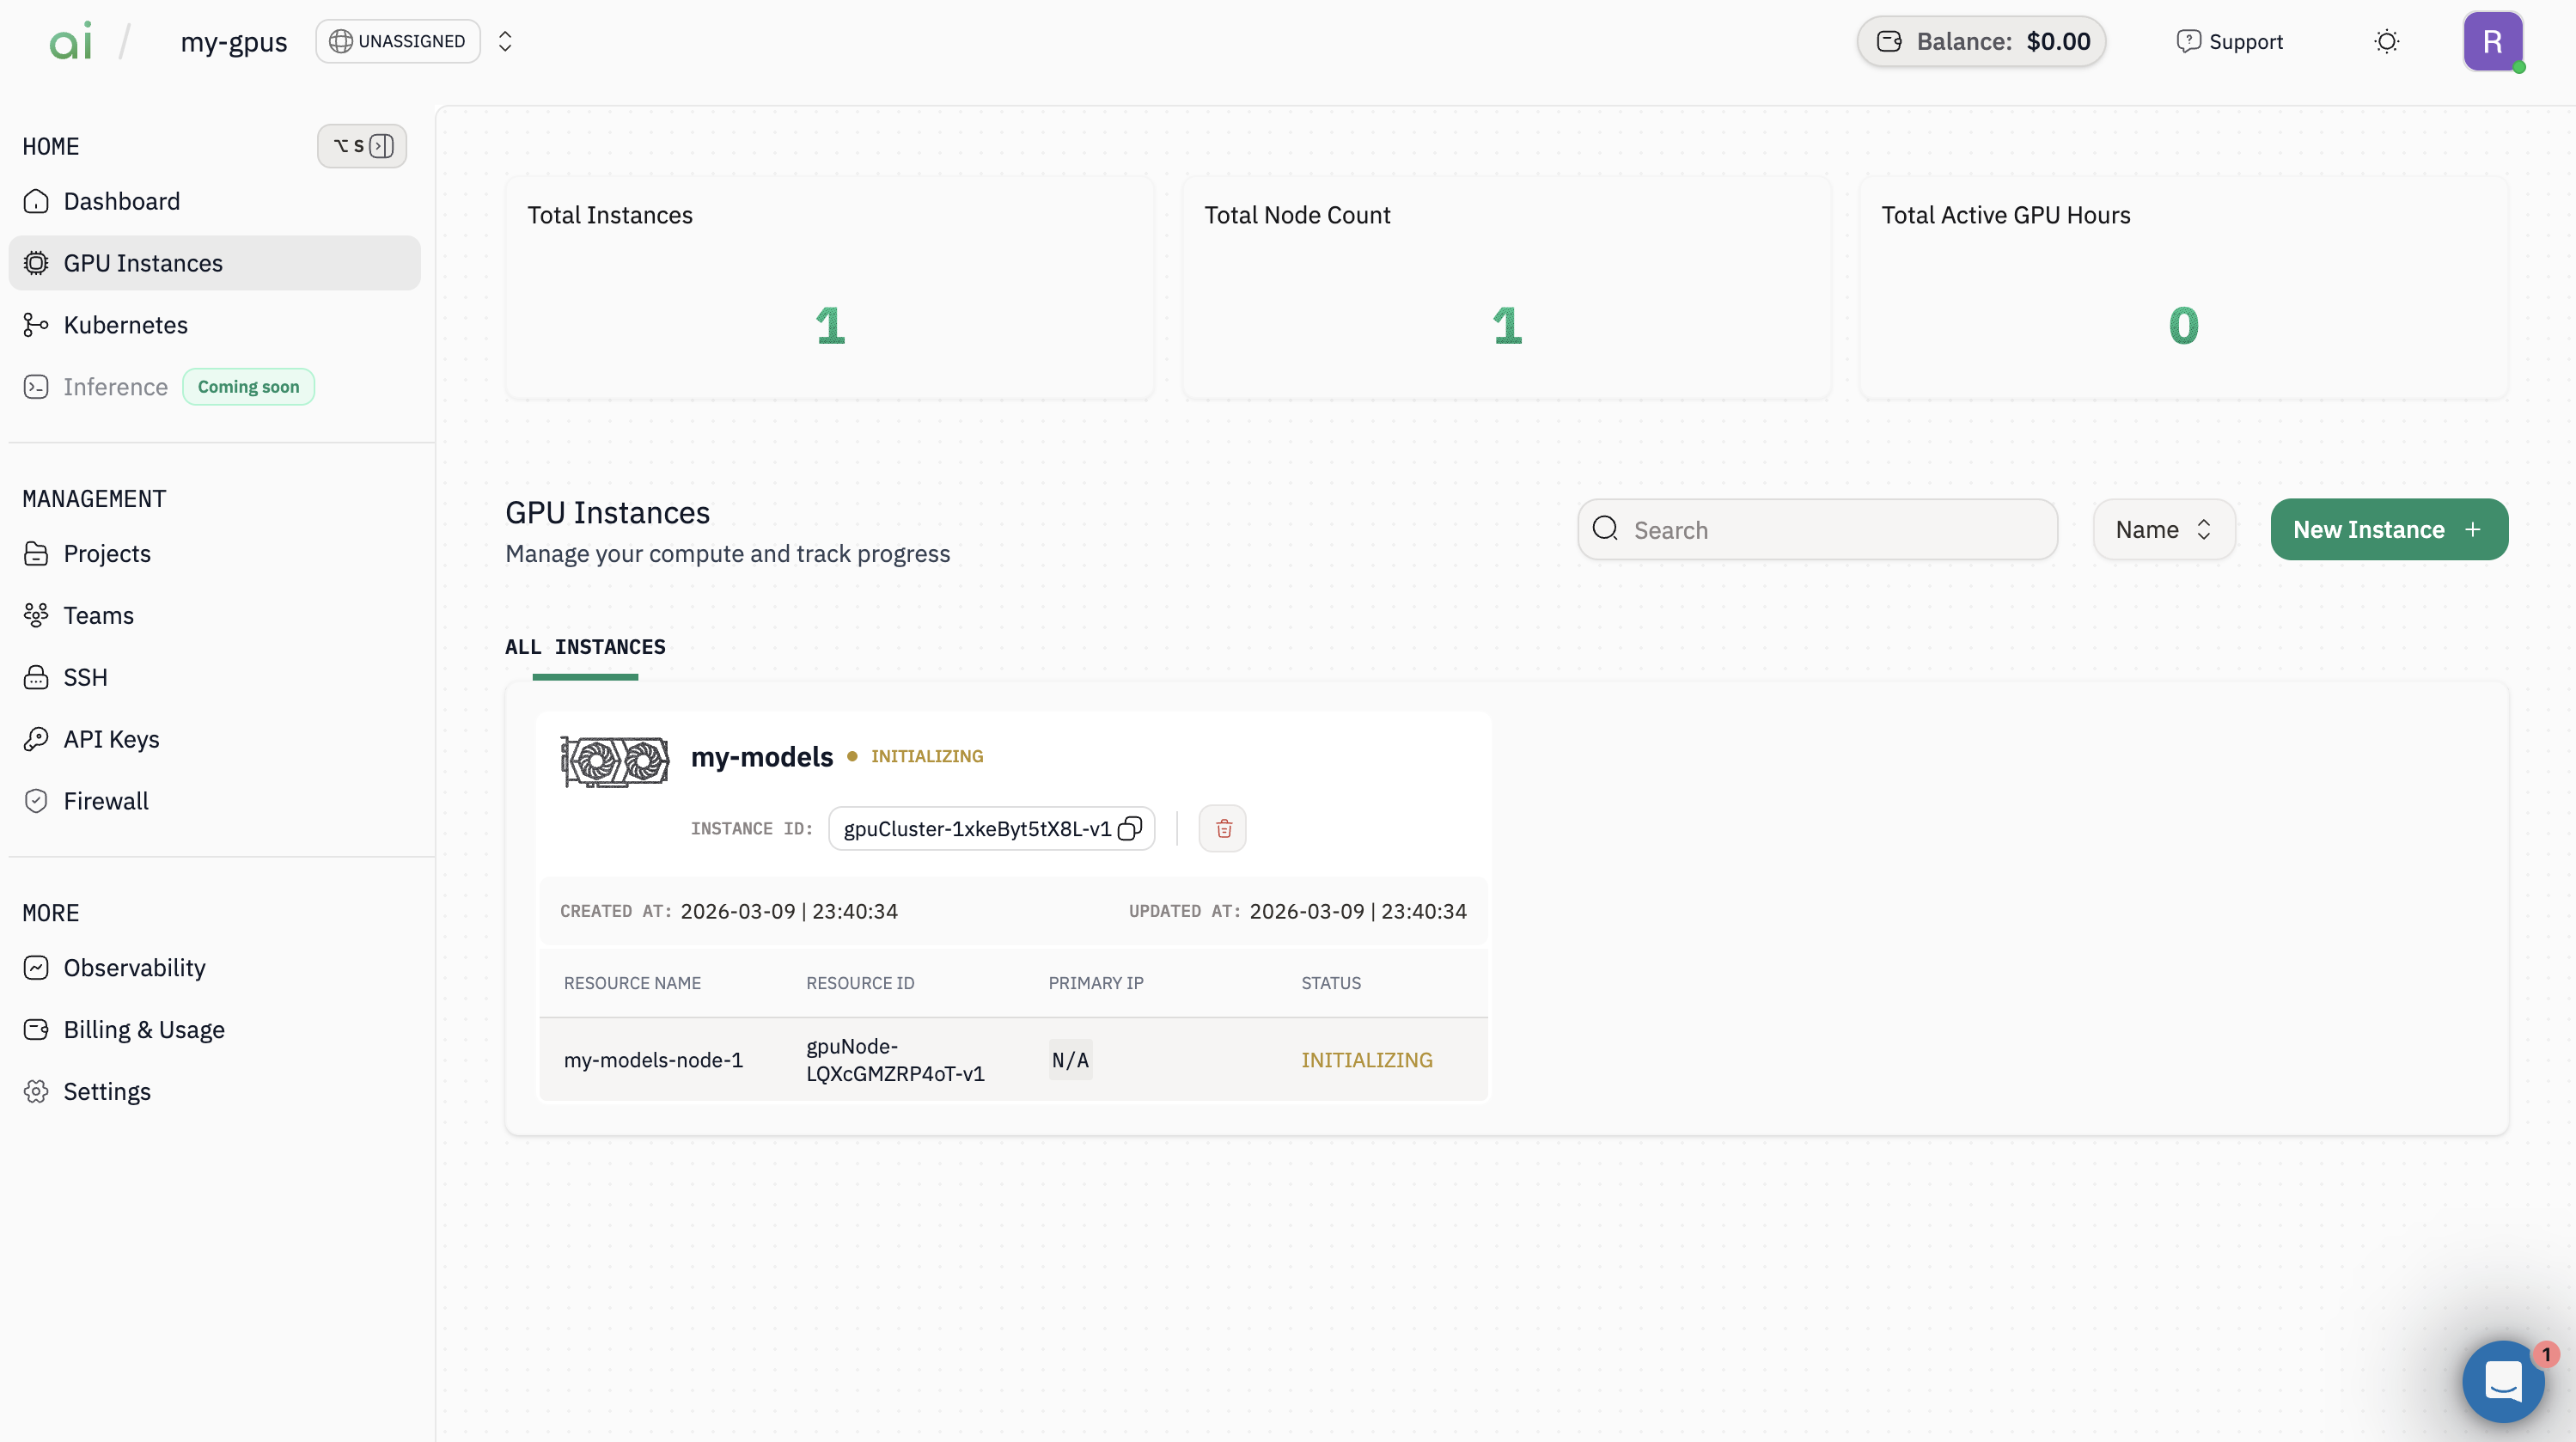
GPU Instances page, where you can monitor its status and access connection details.
Step 4: Connect via SSH
Once your instance is running, open it from theGPU Instances page to view connection details.
Now to connect to the GPU instance use the following SSH command format:
Private key:Use the private key that corresponds to the public key you uploaded to AIONUsername:This depends on your selected image- Ubuntu-based images typically use
ubuntu - Check your instance details for the correct username
- Ubuntu-based images typically use