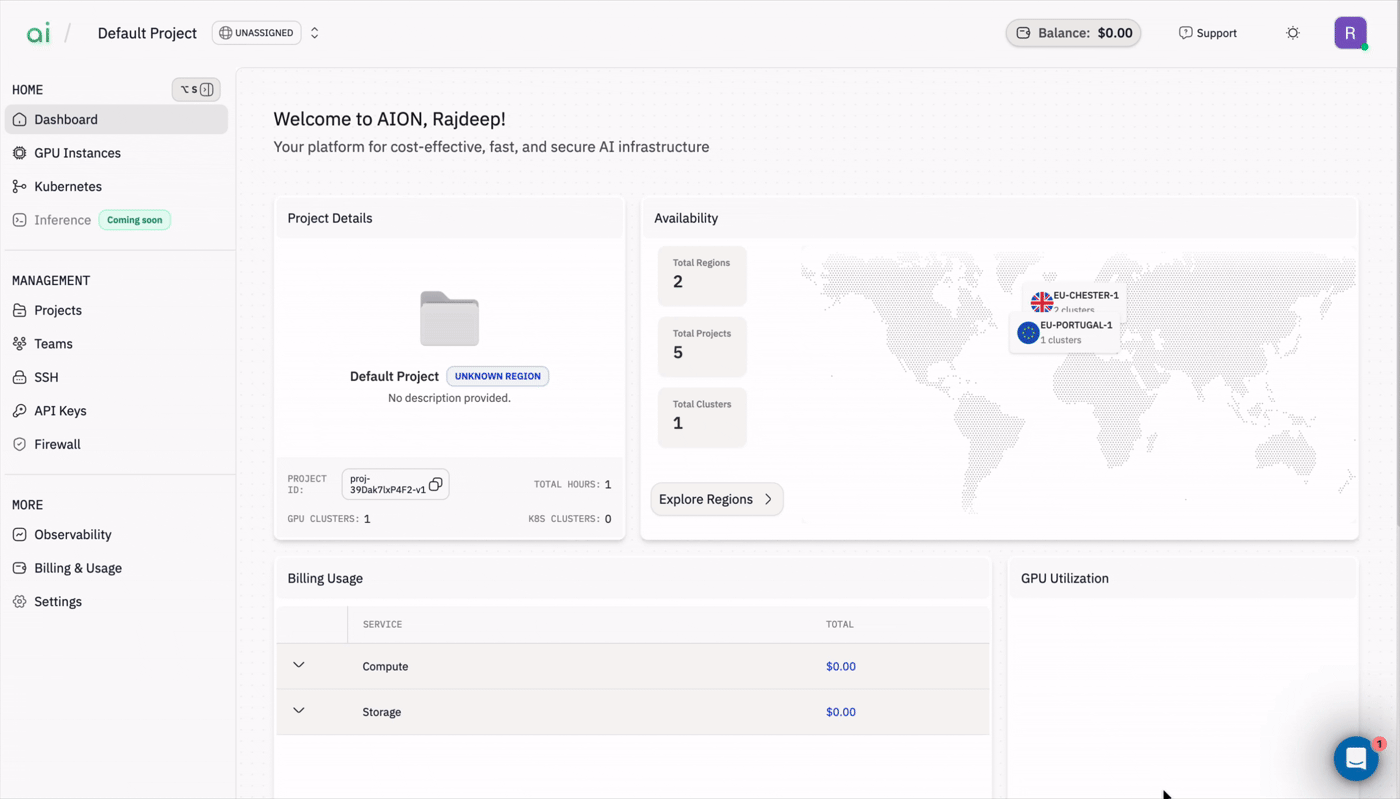
Step 1: Open the Kubernetes page
Start by navigating to AION and opening the Kubernetes console.- In the left navigation, click
Kubernetes(underHome). - The Kubernetes page shows a world map and region cards with available GPU clusters, GPU types, and pricing.
Step 2: Choose a region / cluster and provision
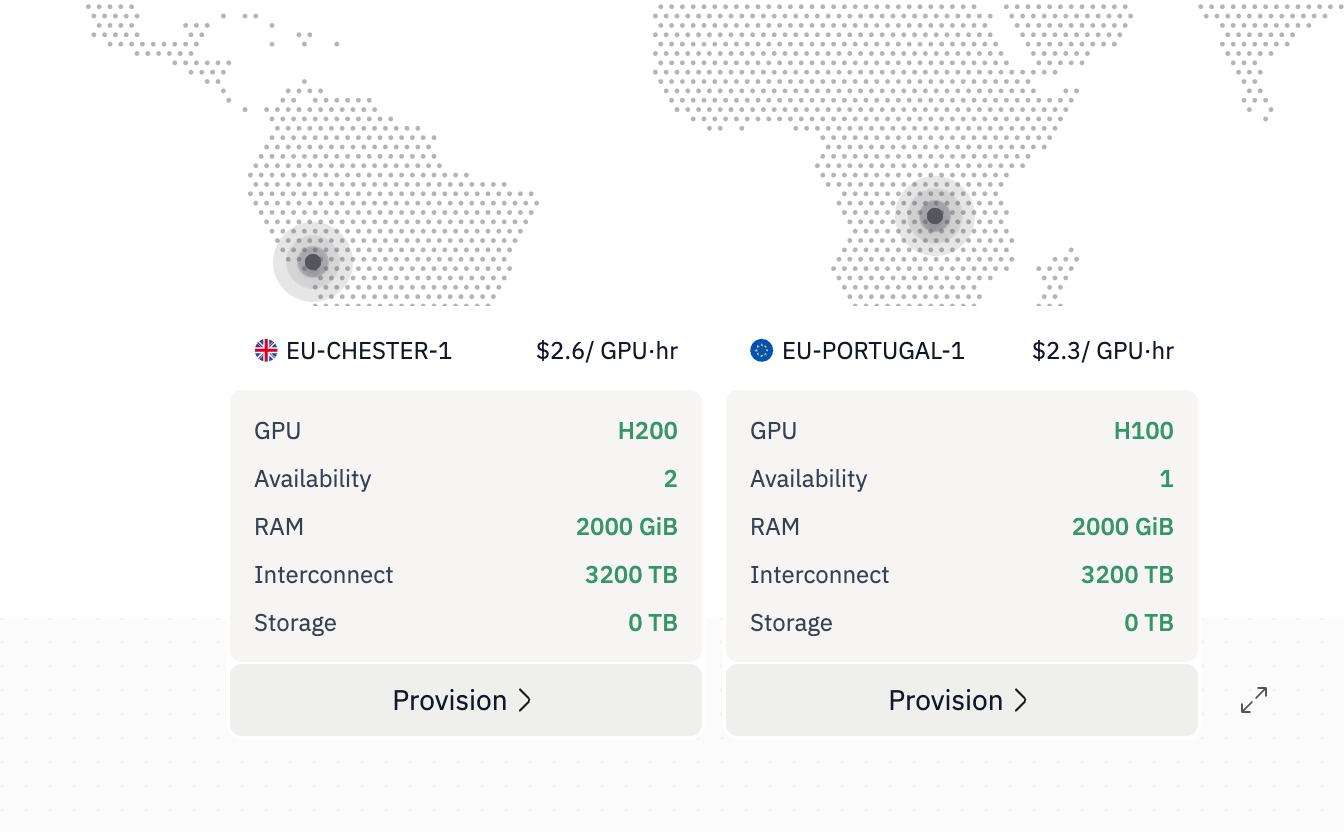
- Browse the available region cards and the interactive map. Each card displays:
GPU type(H100, H200, etc.)AvailabilityRAM/Interconnect/StoragePrice per hour
- Select the region / cluster that matches your GPU, memory, and price requirements.
- Click
Provisionon the card for the region/cluster you want to deploy.
Provision, you will move to the project selection step.
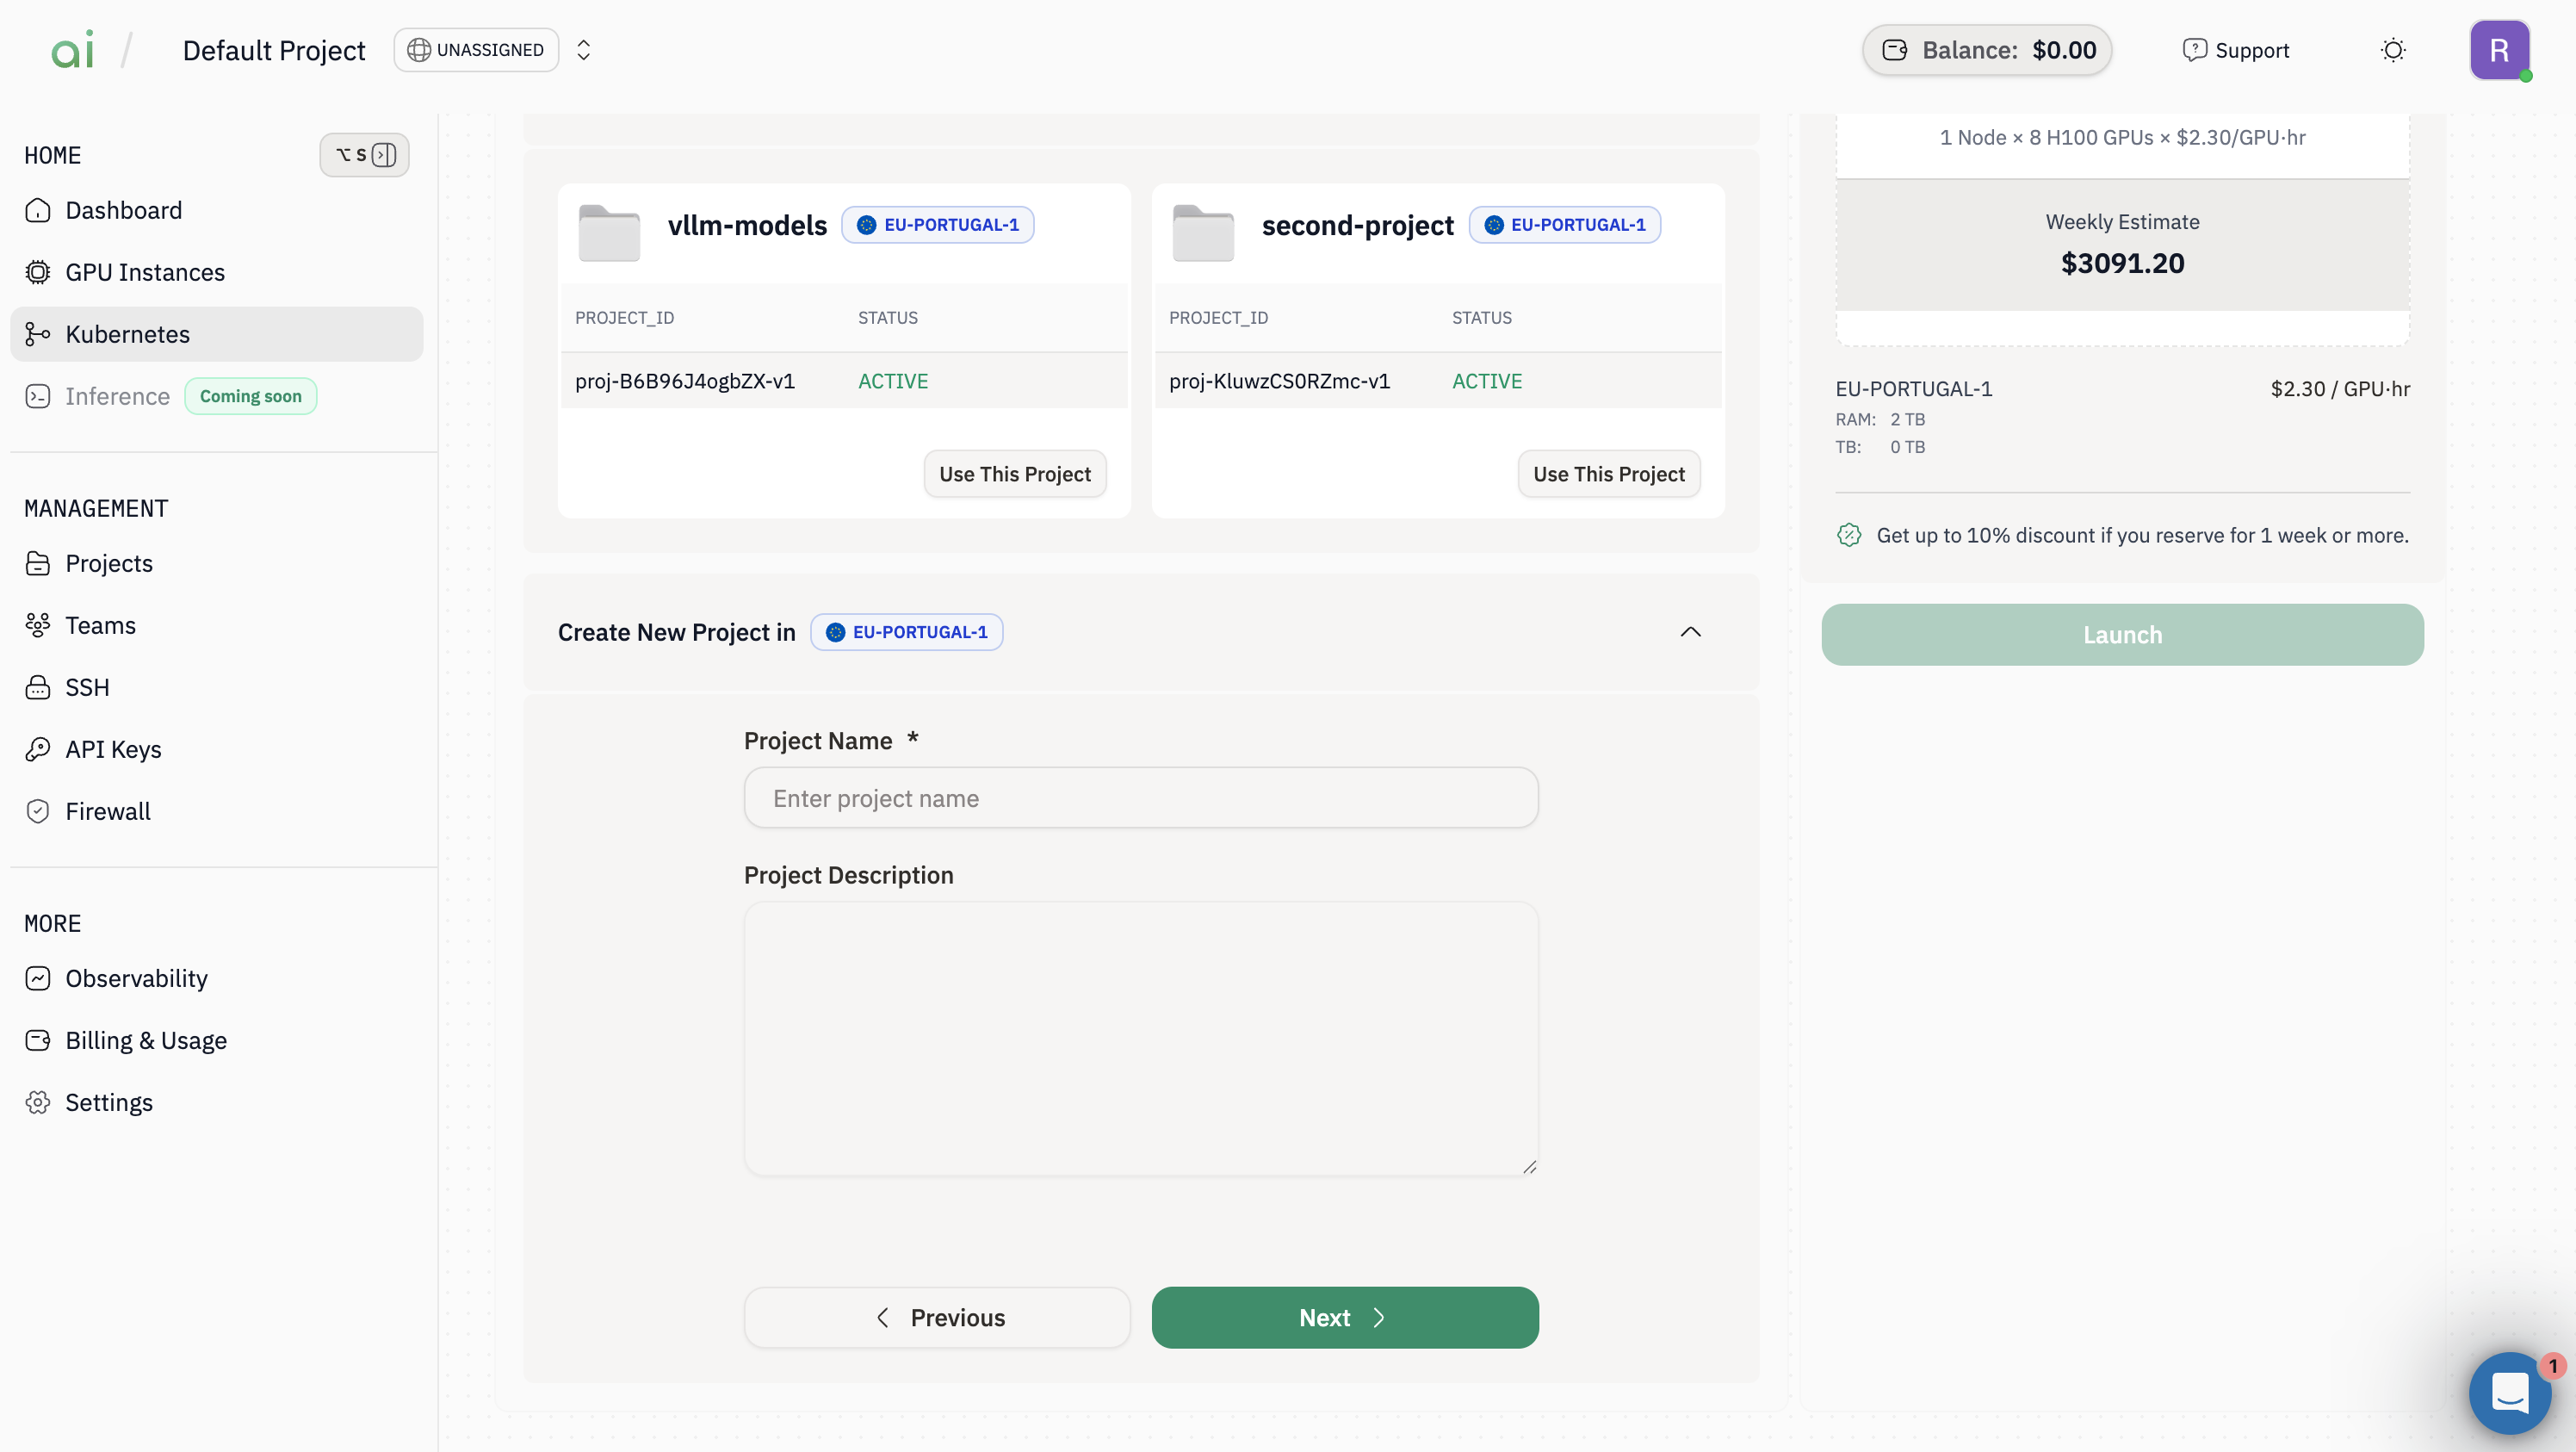
Step 3: Create or select a project
You must either pick an existing project or create a new one before launching a cluster.-
On the Project step, either choose
Existing Projectsor expandCreate New Project. -
If creating a new project, fill in:
Project Name(required)Project Description(optional)
-
Click
Nextto proceed to the cluster configuration step.
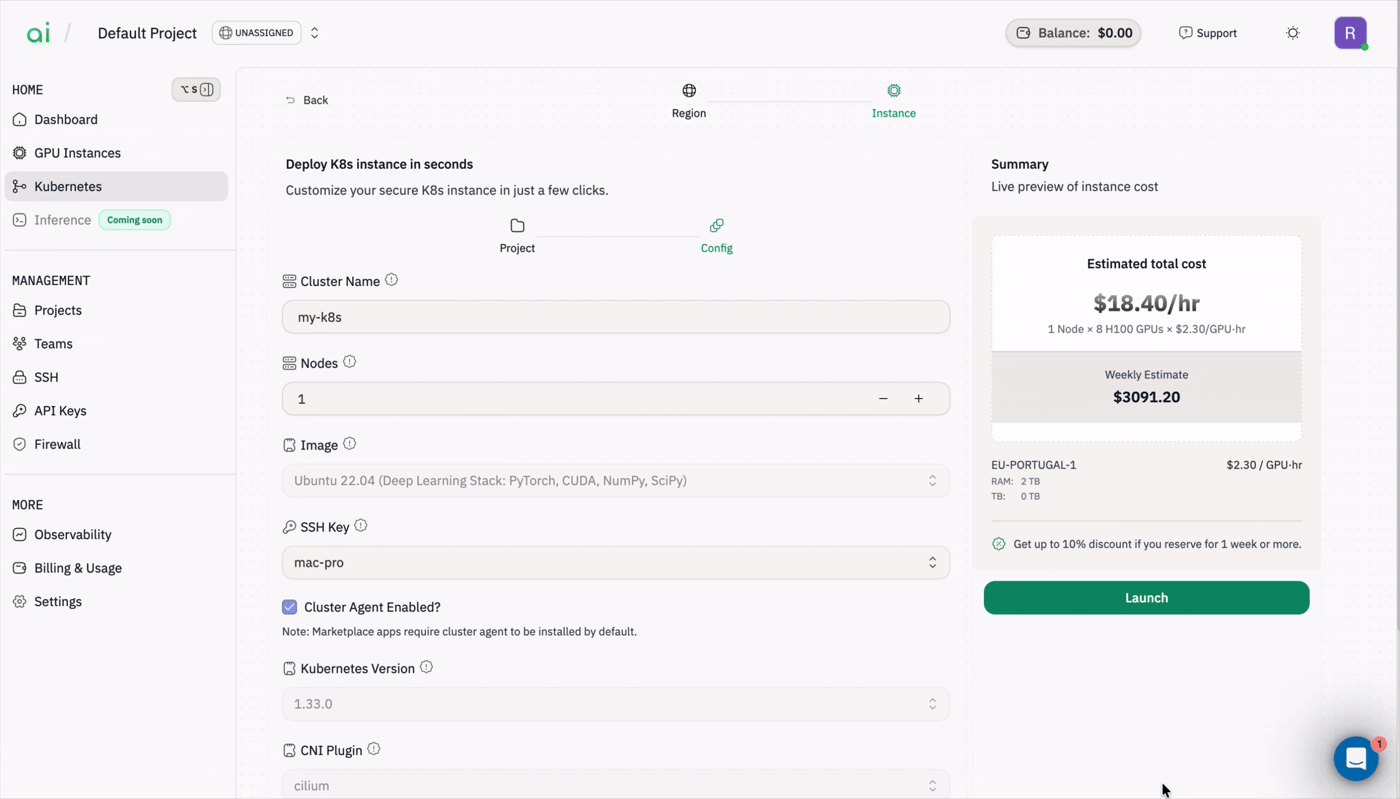
Step 4: Configure the cluster and launch
Define the cluster configuration and launch it.- Fill the cluster configuration fields shown in the UI:
Cluster Name: A friendly name such asmyfirstk8sNodes: Use the – / + controls to set the number of nodesImage: Select a base image (for deep learning stacks this may include PyTorch/CUDA)SSH Key: Select the public key you uploaded earlierKubernetes Version: Choose the desired K8s versionCNI Plugin,Pod CIDR,Service CIDRand other network fields
- Review the Estimated total cost shown in the summary panel on the right.
- Click the green
Launchbutton to create the cluster.
Initializing while nodes come up.
Step 5: Retrieve the Kubeconfig command
Once the cluster is created it will appear in theCurrent cluster section.
- Open the cluster details from the Current cluster list.
- Click
KubeConfig(or the KubeConfig button). A dialog appears containing a command you can run from your workstation to print the admin kubeconfig.
Copy command or copy the command manually.
Important:Use the exact host and user shown in the dialog. Replace<path-to-your-ssh-private-key>with the path to your private key on your workstation.
Step 6: Save the kubeconfig locally and connect with kubectl
Run the SSH command (copied in Step 5) locally and redirect the output to a file to save the admin kubeconfig.kubectl: