> ## Documentation Index
> Fetch the complete documentation index at: https://docs.aion.xyz/llms.txt
> Use this file to discover all available pages before exploring further.
# Creating Your First Project
> Create a project to organize compute resources, manage access, and track usage in AION.
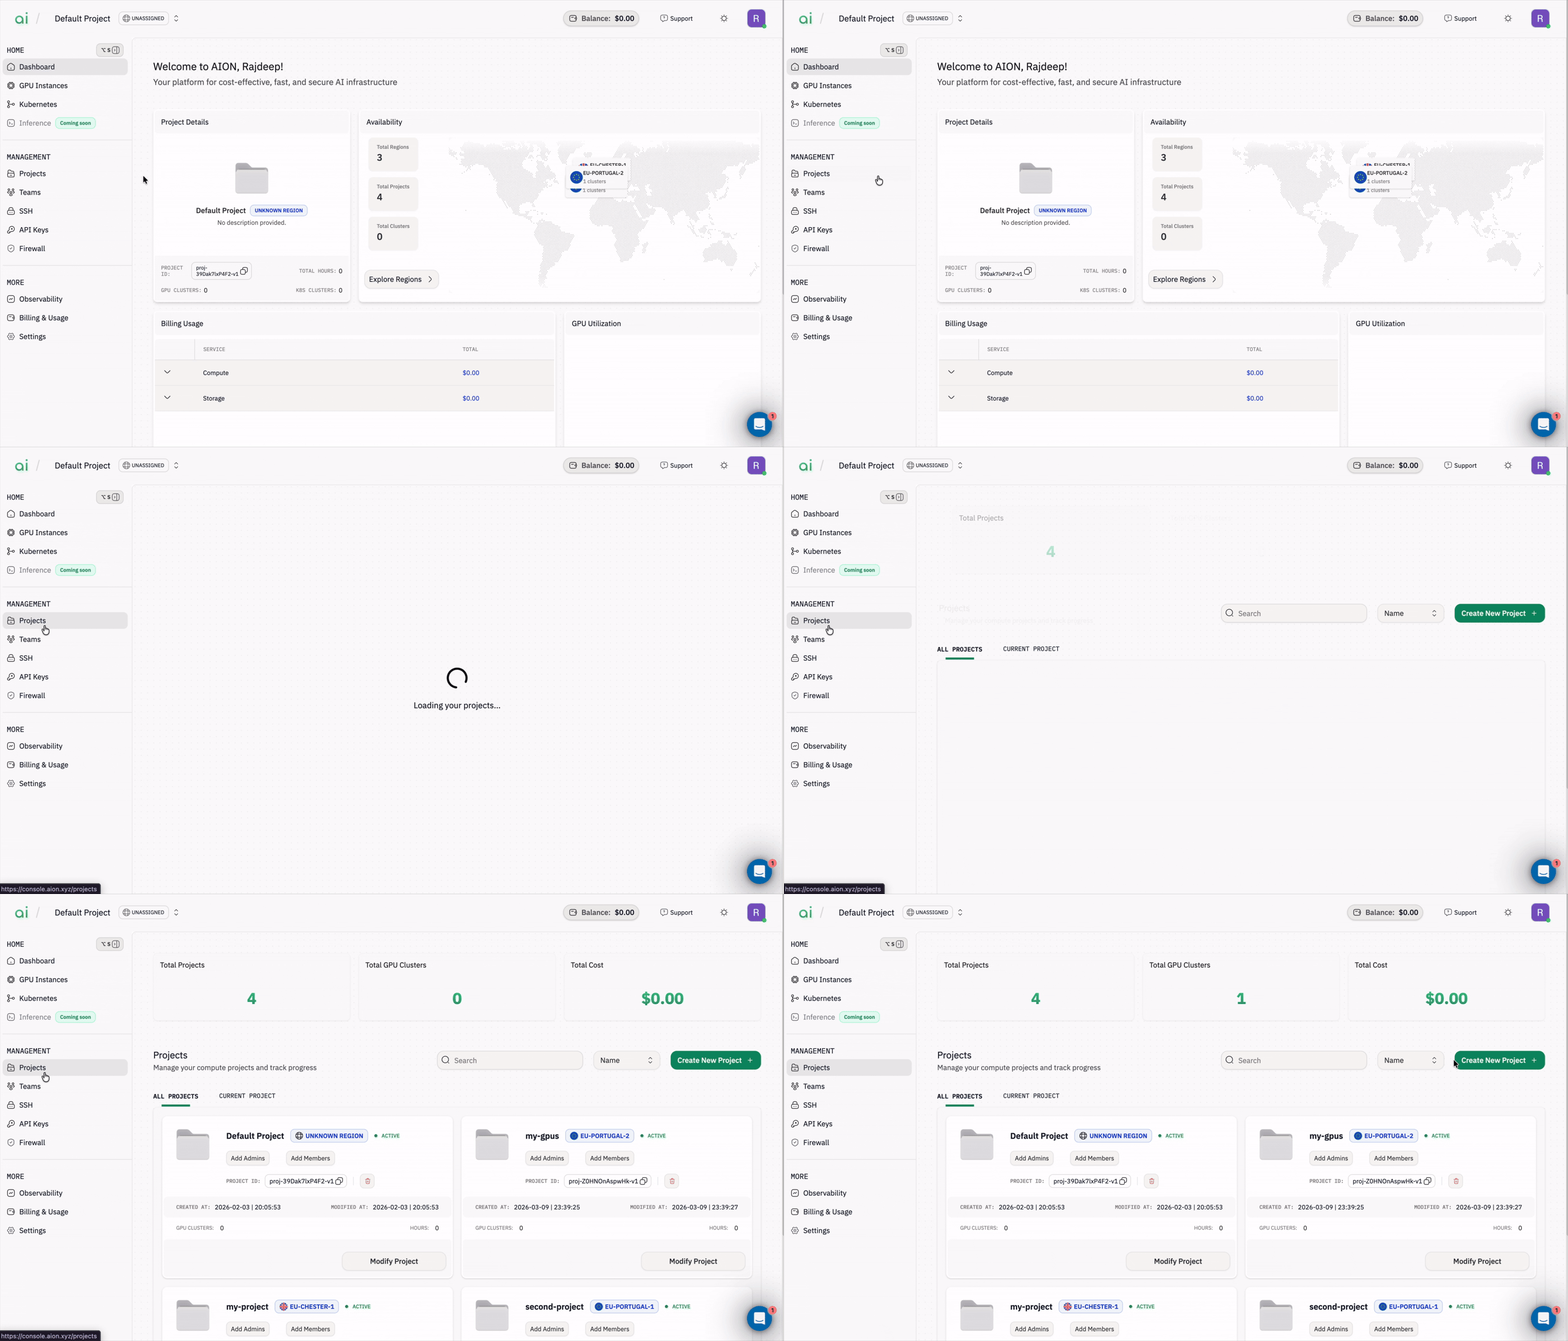
#### Step 1: Open the Projects page
Start by navigating to the Projects section in the AION console.
1. In the left sidebar, go to `Management → Projects`.
2. You’ll land on the Projects page where you can view all existing projects.
 #### Step 2: Start creating a new project
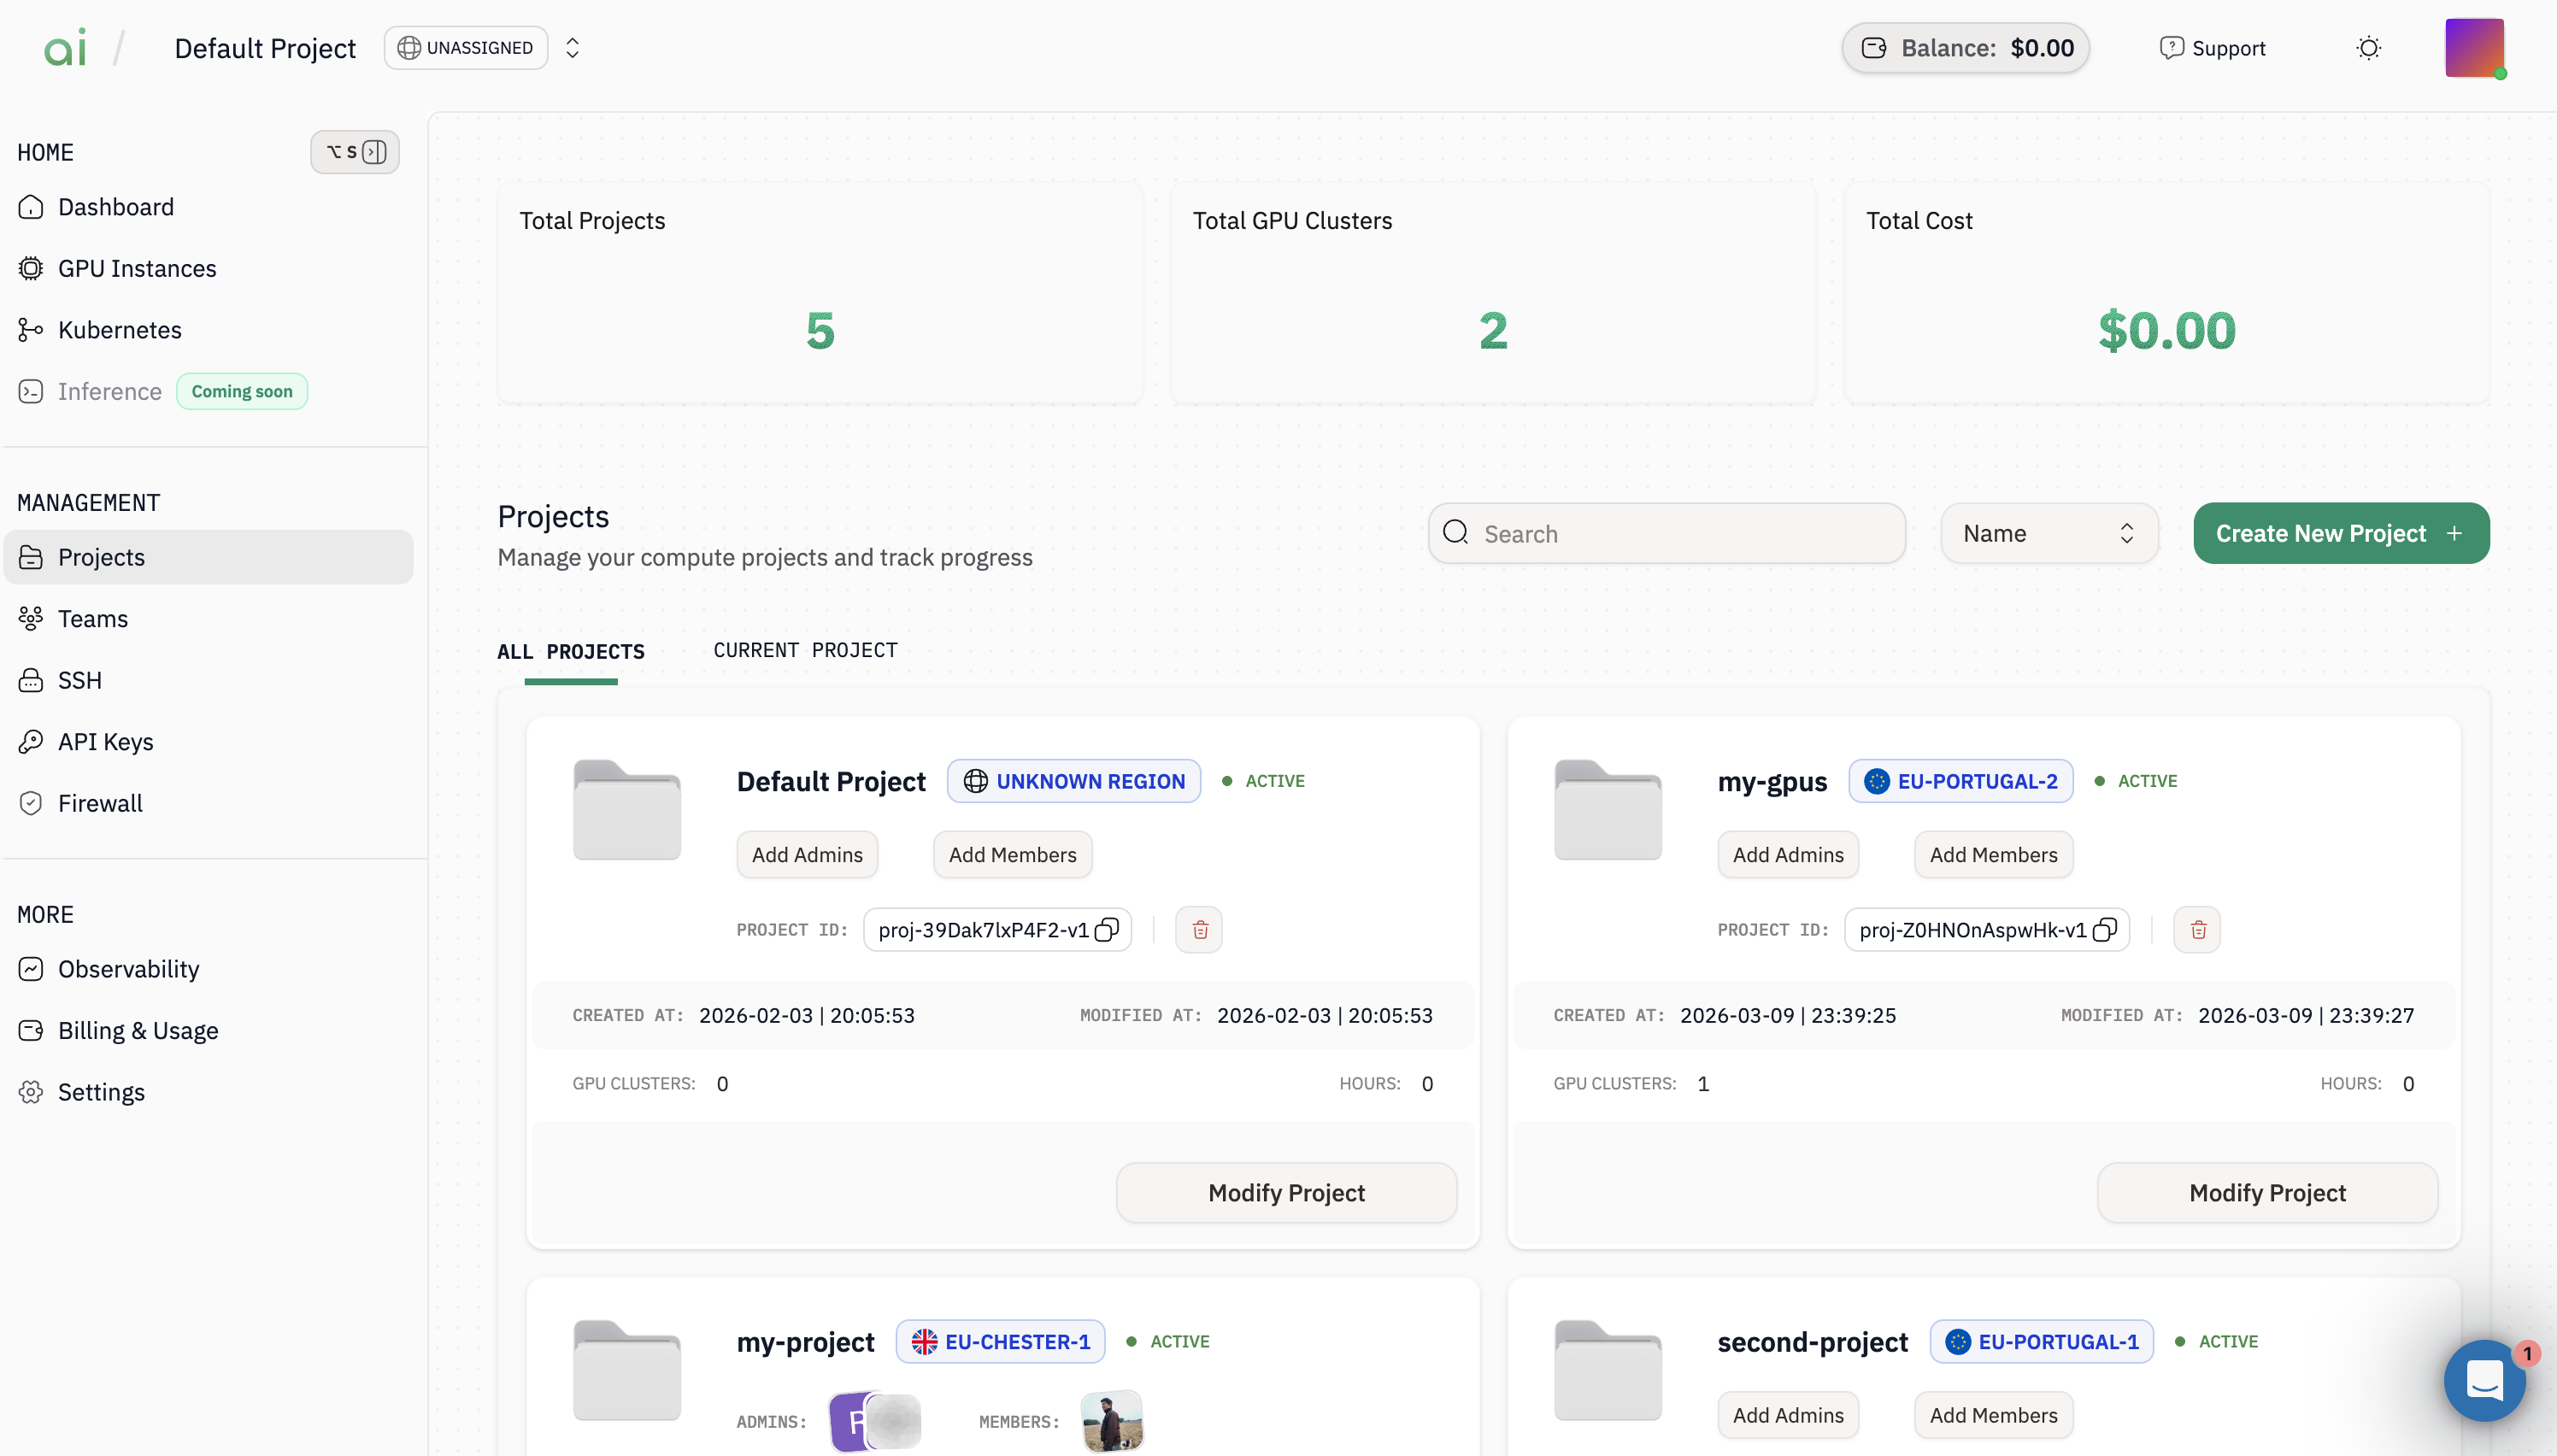
From the Projects page, click on the `Create New Project +` (top-right) to begin the project creation flow.
#### Step 2: Start creating a new project
From the Projects page, click on the `Create New Project +` (top-right) to begin the project creation flow.
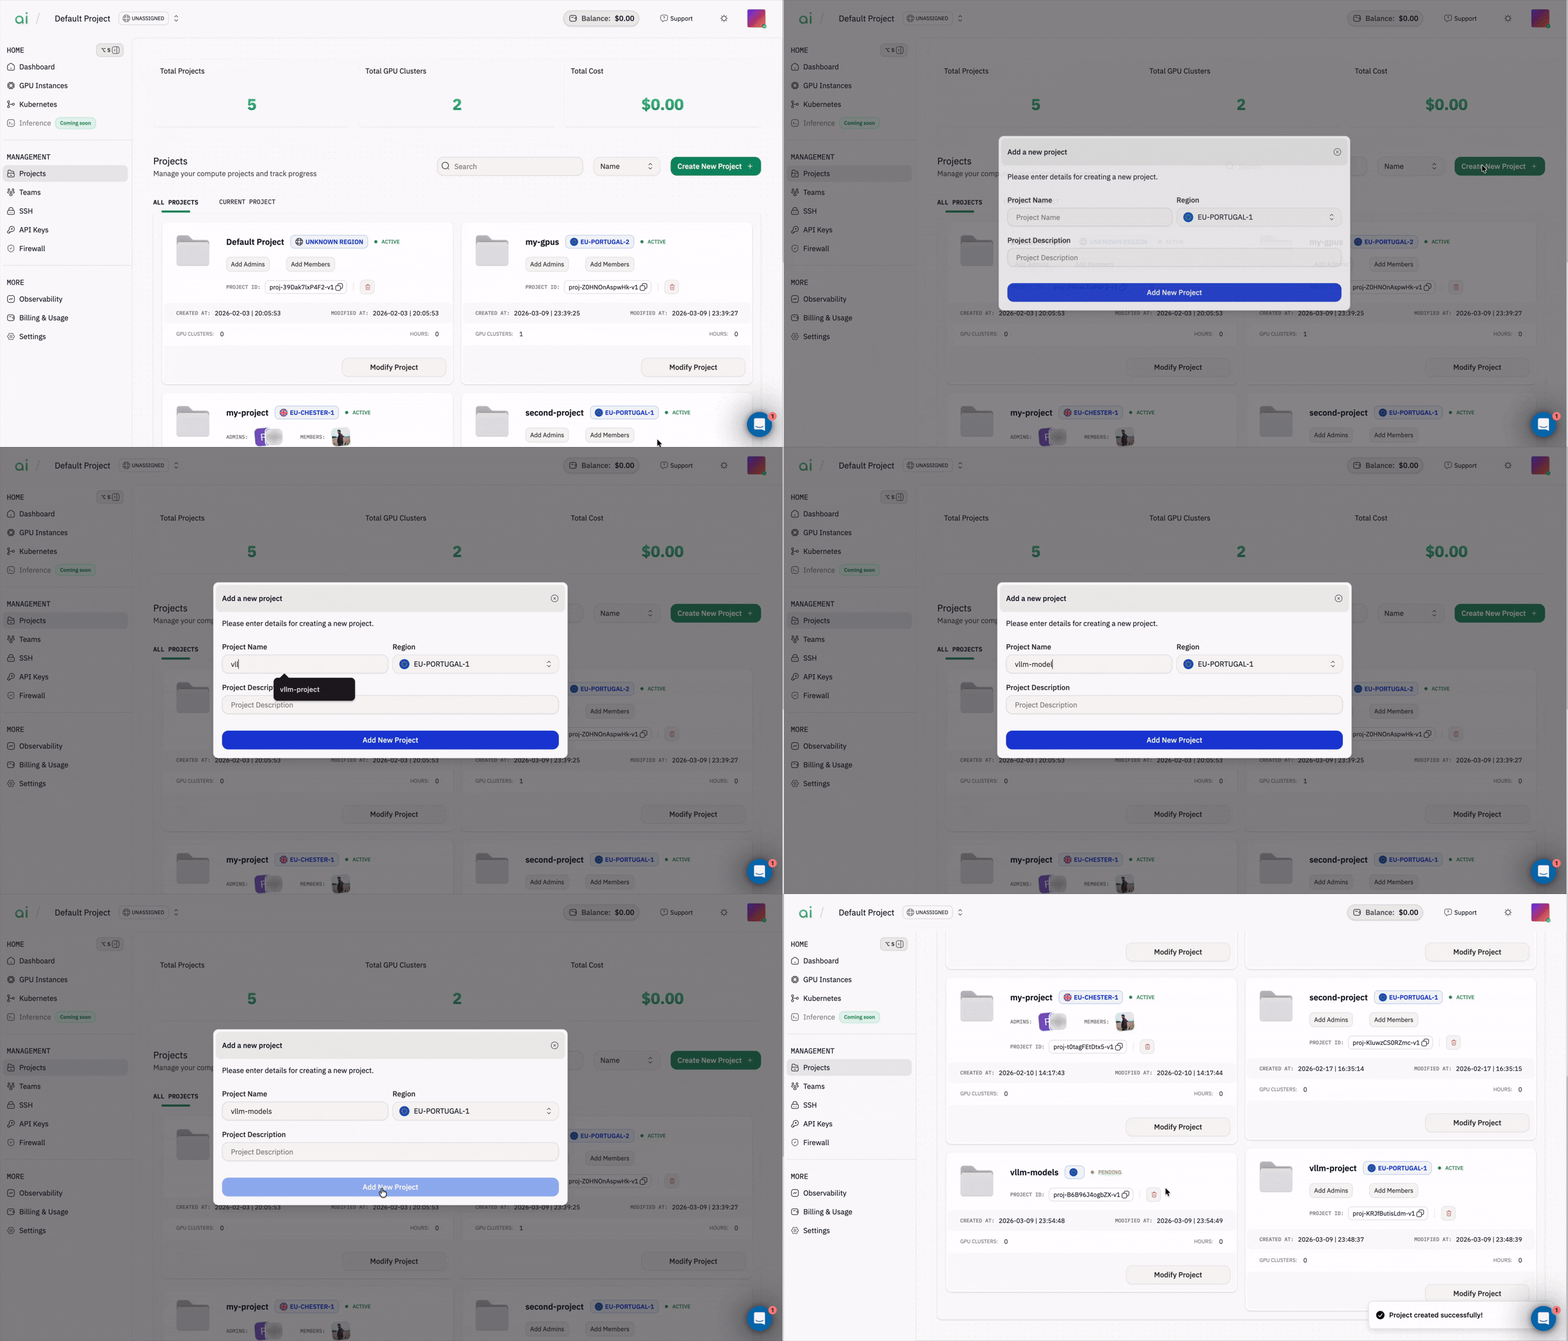
 #### Step 3: Fill in project details
Enter these project information and then click on the `Add New Project` to create the project.
| | |
| --------------------- | ------------------------------------------------------- |
| `Project Name` | Use a name you’ll recognize in your projects list. |
| `Region` | Choose the region where you want your resources to run. |
| `Project Description` | Optional, but helpful for organizing workloads. |
#### Step 3: Fill in project details
Enter these project information and then click on the `Add New Project` to create the project.
| | |
| --------------------- | ------------------------------------------------------- |
| `Project Name` | Use a name you’ll recognize in your projects list. |
| `Region` | Choose the region where you want your resources to run. |
| `Project Description` | Optional, but helpful for organizing workloads. |
 #### Step 4: Verify your project is created
After creation, the project appears in the `All Projects` list. You can open it later to manage members and update details.
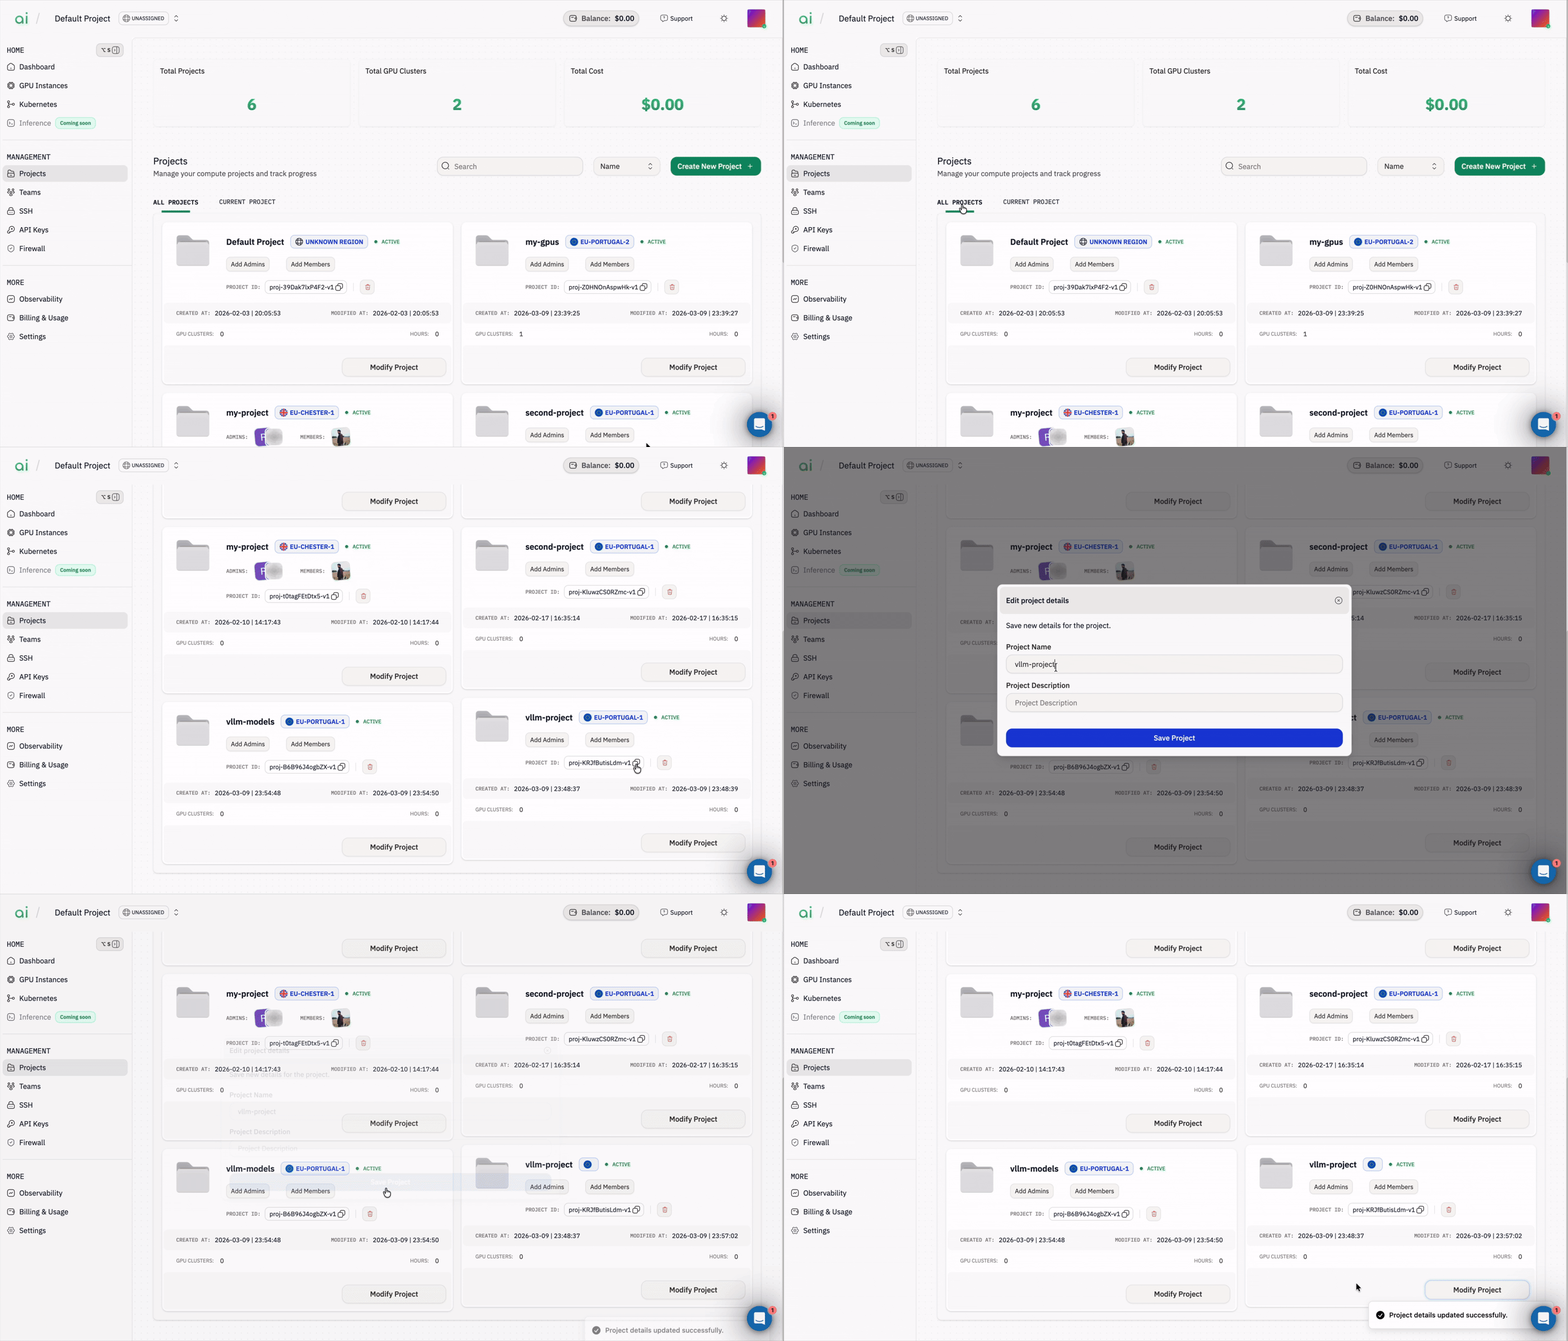
#### Modify project details
You can rename a project or update its description at any time.
1. From the project card, click `Modify Project`.
2. Update the fields you want (for example, `Project Name` or `Project Description`).
3. Click `Save Project`.
#### Step 4: Verify your project is created
After creation, the project appears in the `All Projects` list. You can open it later to manage members and update details.
#### Modify project details
You can rename a project or update its description at any time.
1. From the project card, click `Modify Project`.
2. Update the fields you want (for example, `Project Name` or `Project Description`).
3. Click `Save Project`.
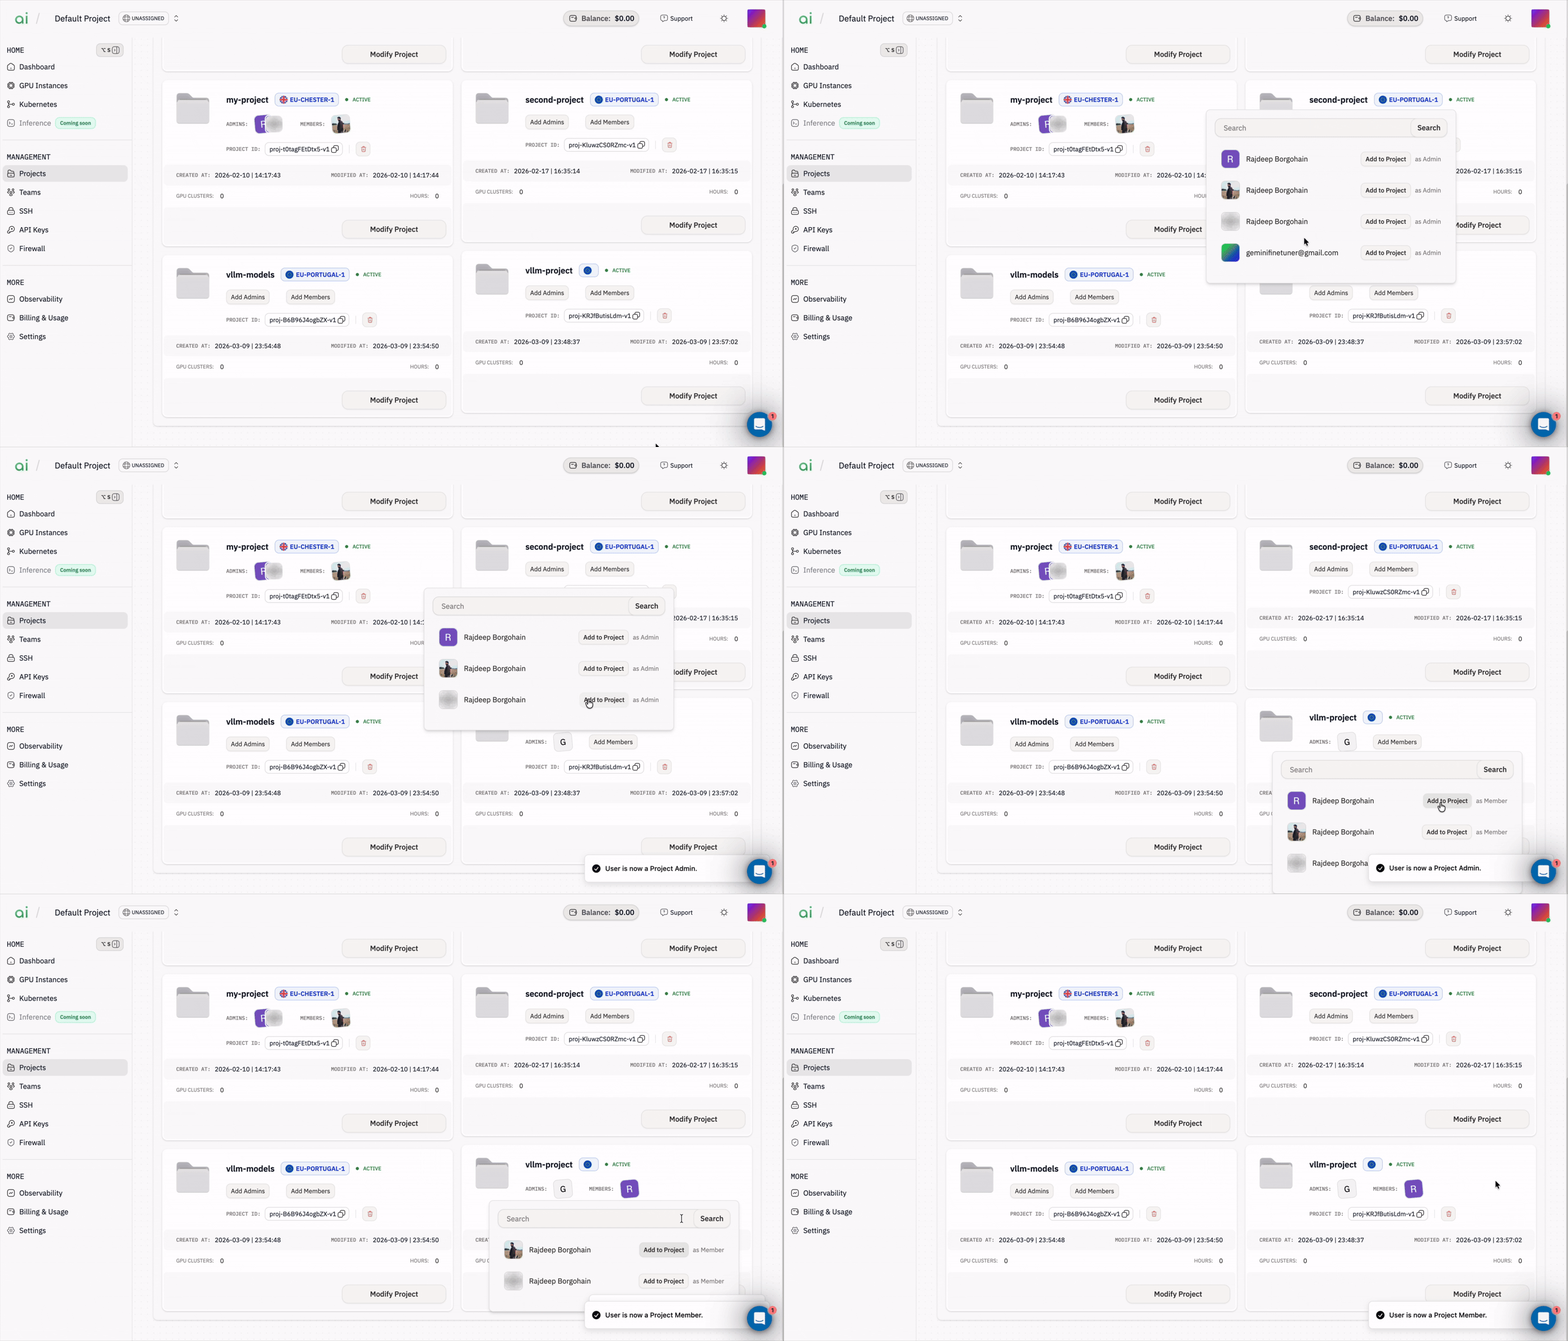
 #### Add admins and members
Projects can have admins and members. Admins can manage project settings and access.
1. On the project card, click `Add Members`.
2. Use the search box to find your teammate.
3. Click the teammate’s name to add them.
#### Add admins and members
Projects can have admins and members. Admins can manage project settings and access.
1. On the project card, click `Add Members`.
2. Use the search box to find your teammate.
3. Click the teammate’s name to add them.
 > `Important:` You can follow the same steps to add additional members or admins (depending on your workspace permissions).
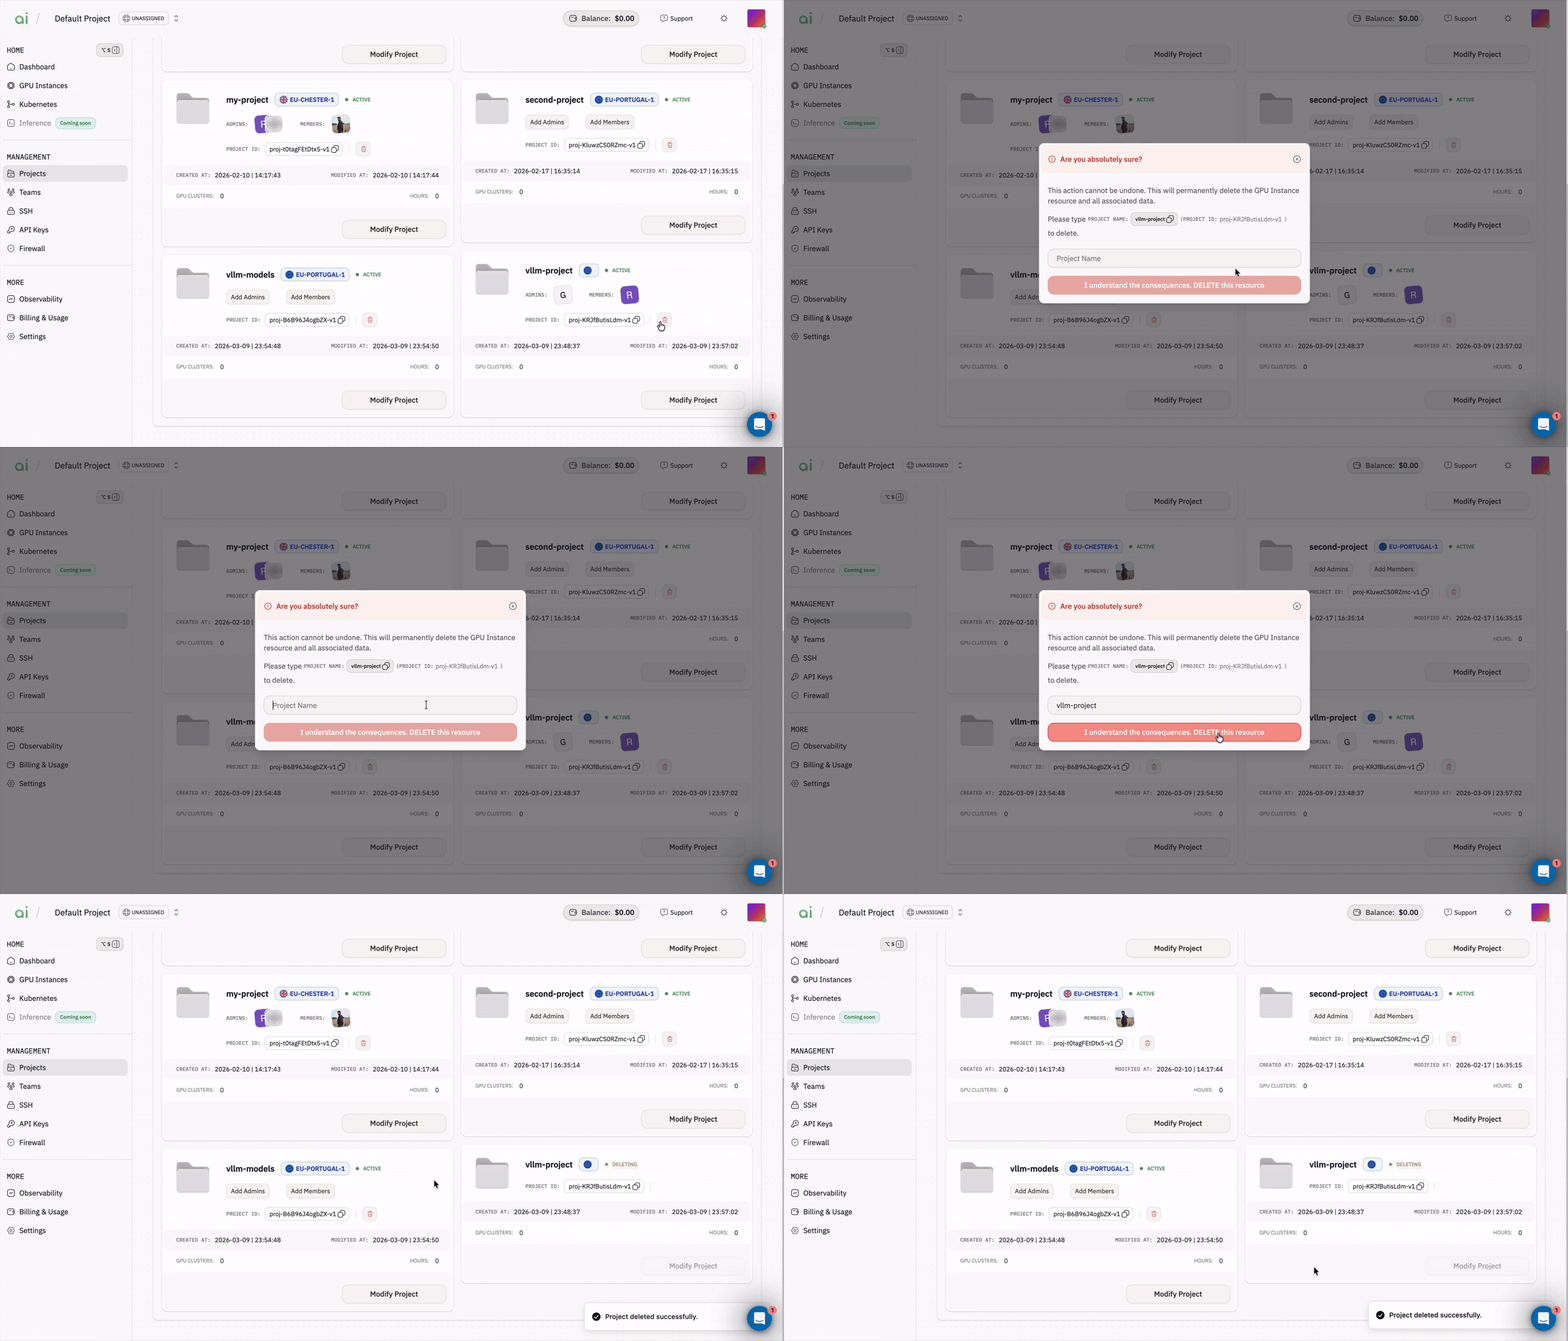
#### Delete a project
> `Warning:` Deleting a project is permanent and cannot be undone.
1. Click the delete (trash) icon on the project card.
2. In the confirmation dialog, type the exact `Project Name` shown.
3. Click `I understand the consequences. DELETE this resource` to complete deletion.
> `Important:` You can follow the same steps to add additional members or admins (depending on your workspace permissions).
#### Delete a project
> `Warning:` Deleting a project is permanent and cannot be undone.
1. Click the delete (trash) icon on the project card.
2. In the confirmation dialog, type the exact `Project Name` shown.
3. Click `I understand the consequences. DELETE this resource` to complete deletion.